Grinnell Lake Trail in Glacier National Park: A Hiking Guide
The Grinnell Lake Trail in Glacier National Park is an excellent hike the Many Glacier area, and, thanks to its relative lack of elevation gain, is one of the best beginner-friendly hikes in the entire park.
Plus, with the incredible blue water in the lake, there’s an incredible pay-off for what is an easy trail.
While this trail is one of the most popular in Many Glacier, there’s still far less foot traffic than you’d find at the popular trails in West Glacier or along Going-to-the-Sun Road.
In the guide below, I’m sharing everything you’ll need to know for this hike from what to bring to the different ways you can experience this trail.
You’ll also find plenty of photos to help you determine if this hike is the right fit for your Glacier National Park itinerary.
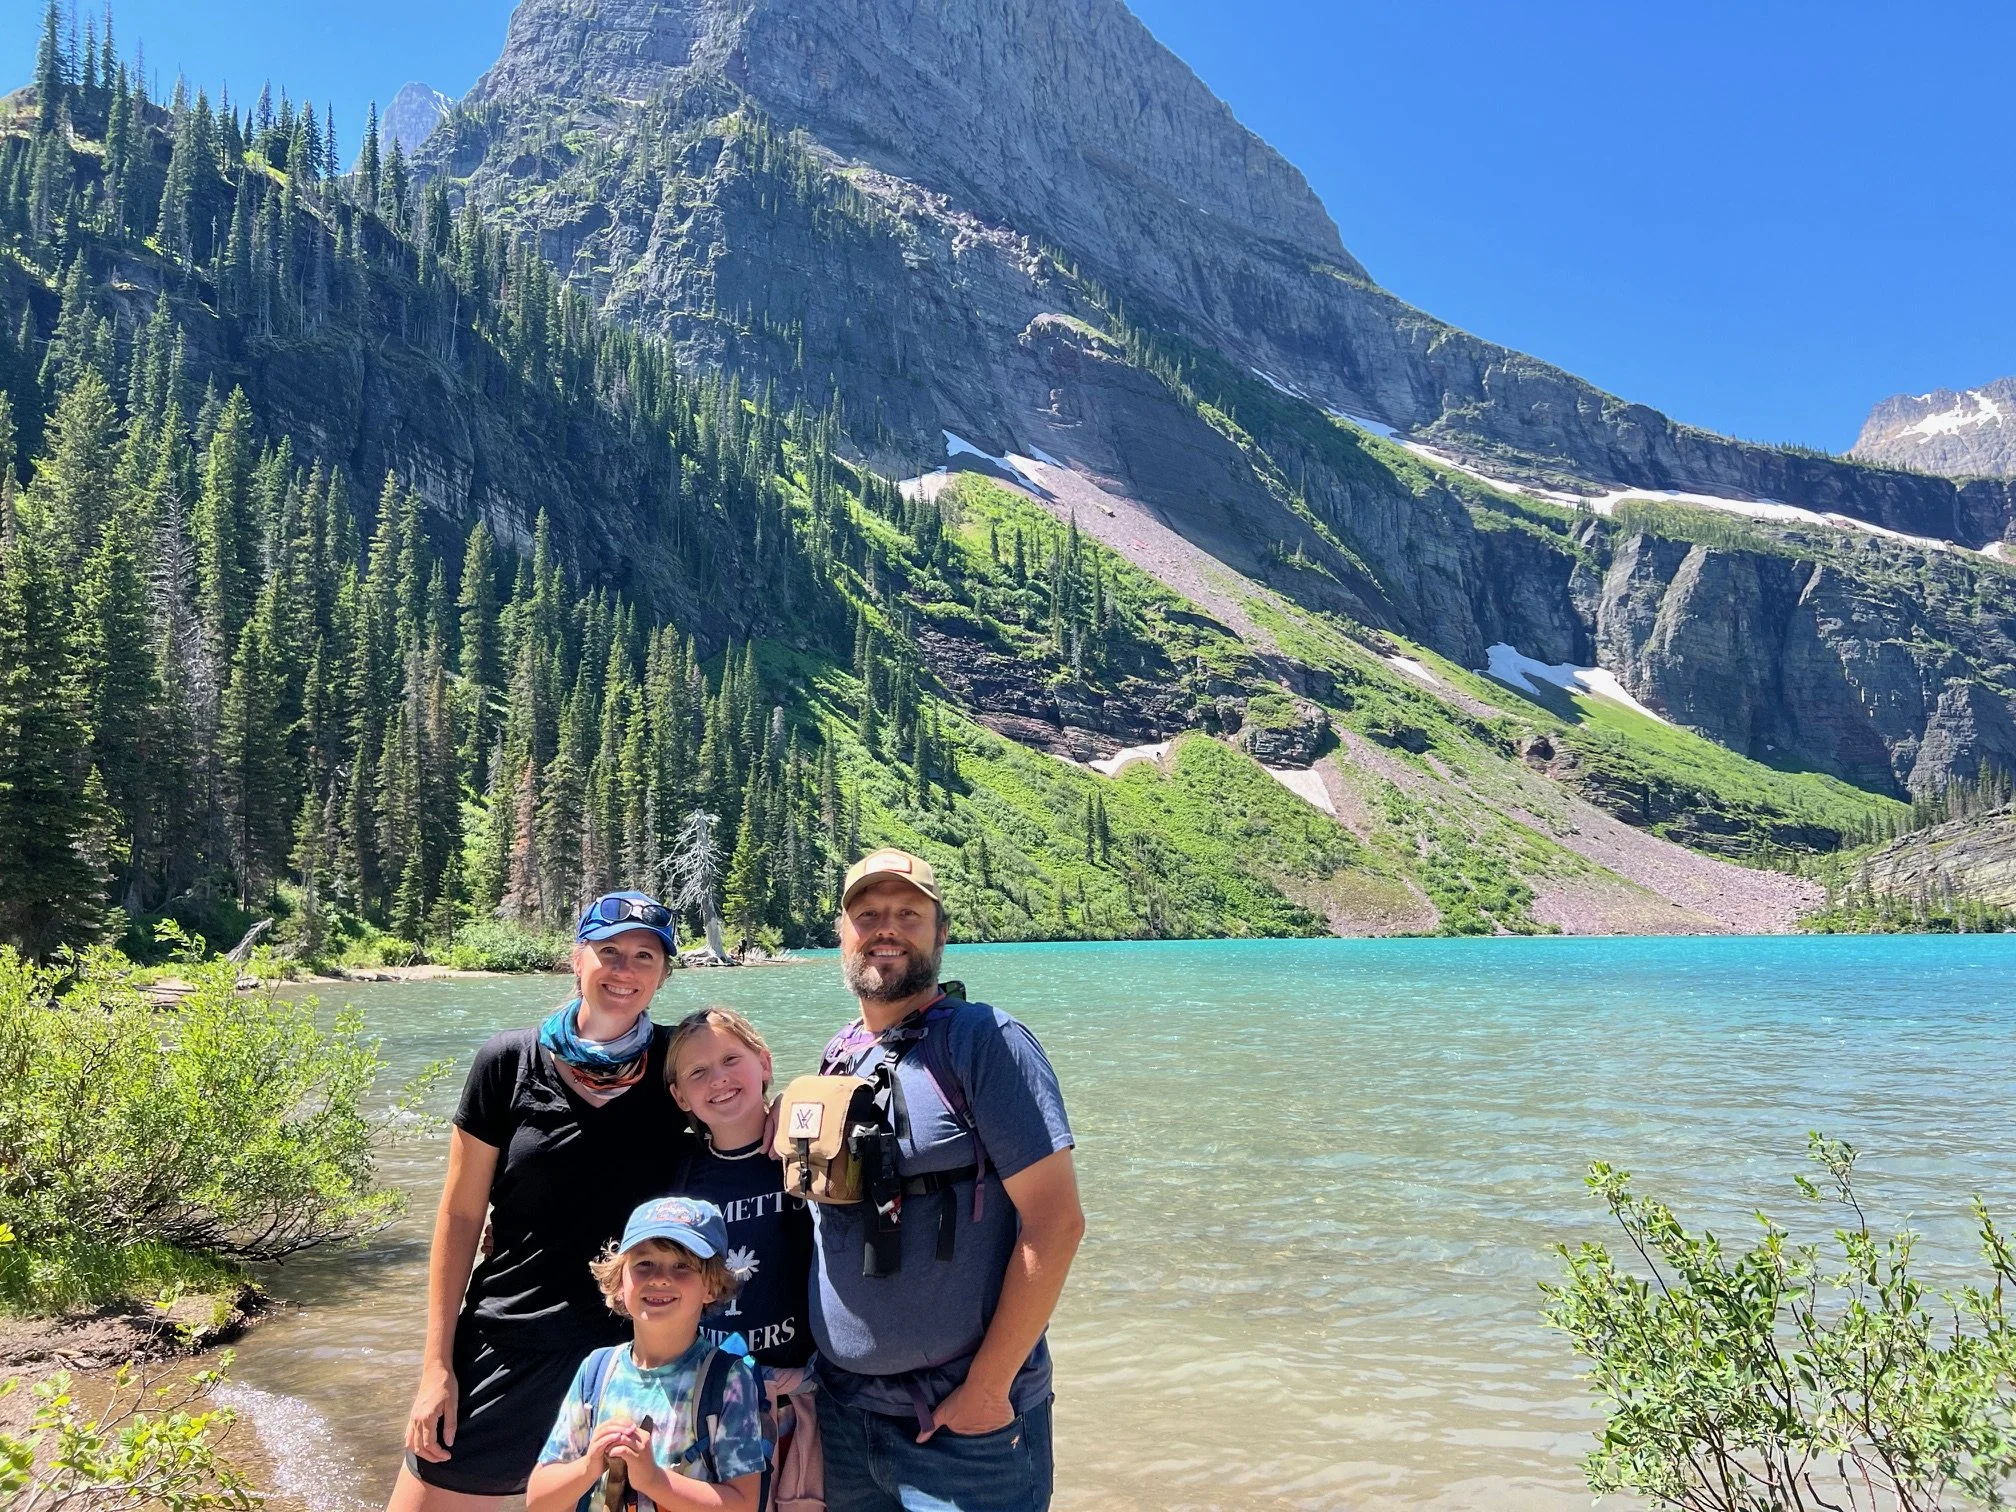
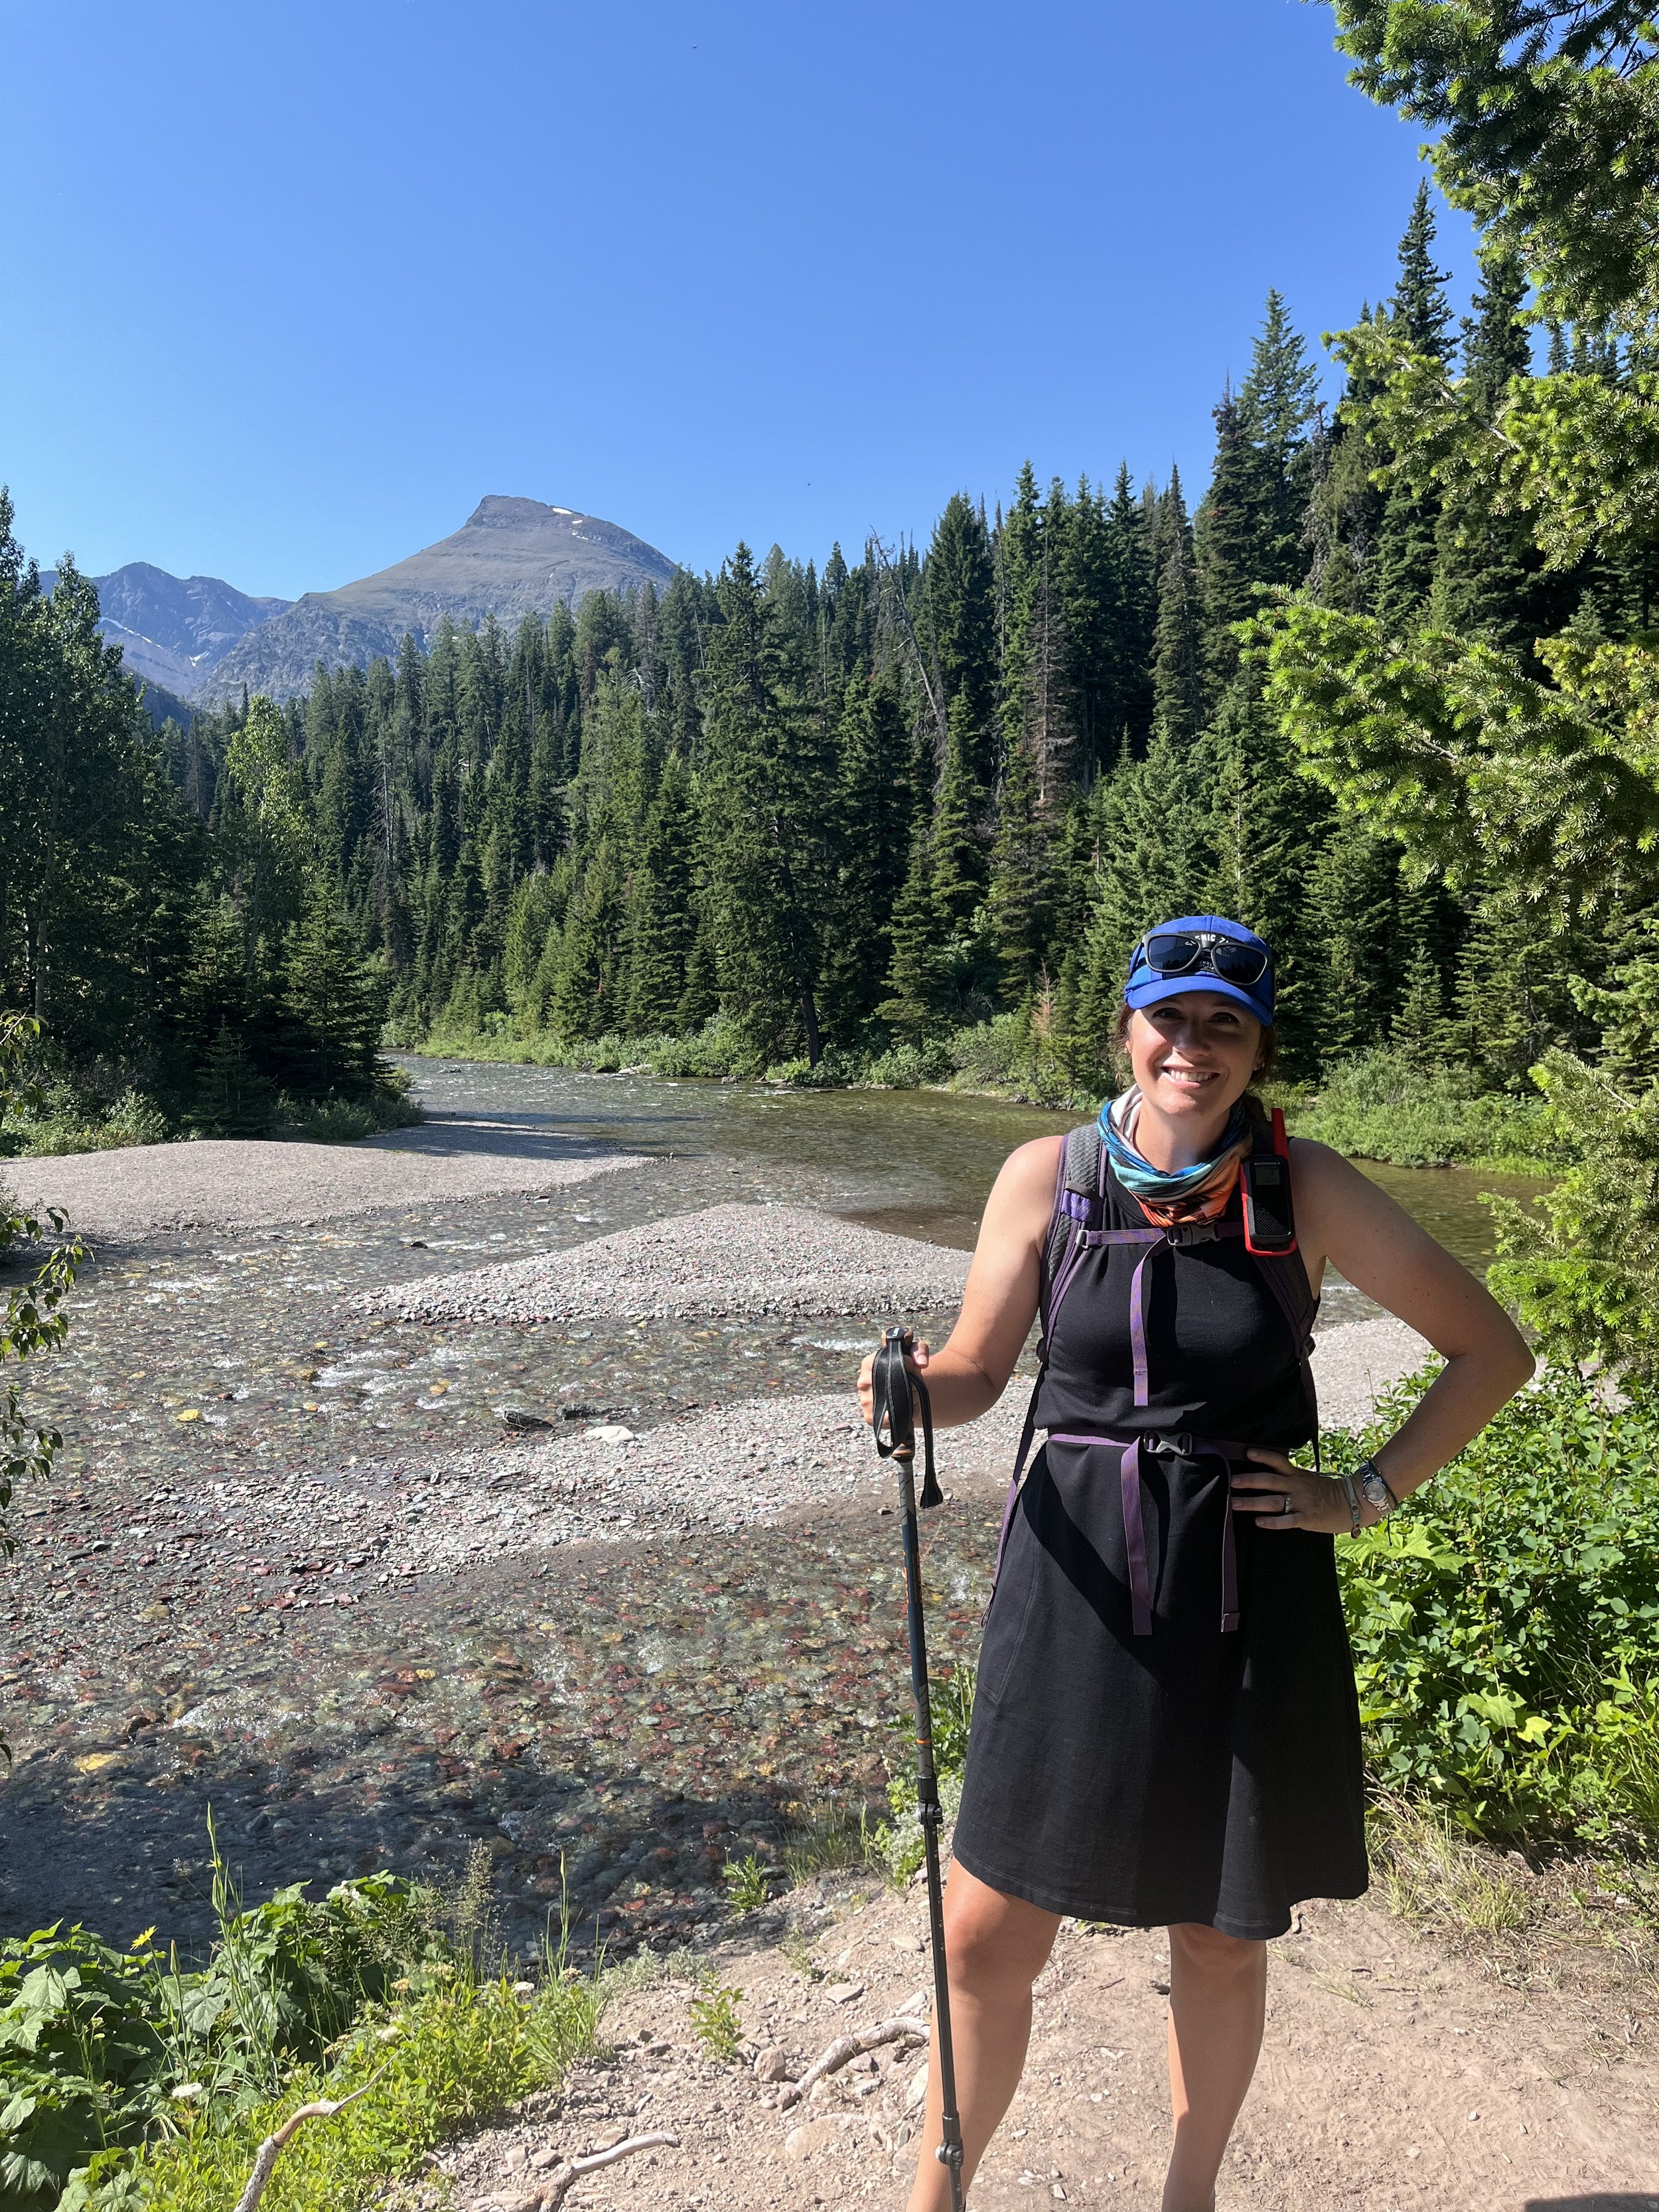
The Camping Kiddos crew at Grinnell Lake
This post contains affiliates. If you purchase from the links below, I will receive a commission at no charge to you. | Updated June 2026
Hike Overview
Trailhead Location: Inside the Many Glacier area of Glacier National Park, Montana
Trail length: up to 6.8 miles, depending on the route you take
Trail difficulty: easy
Elevation gain: approximately 465 feet in total
Starting the Hike: Parking and Trail Information
TIP: Before you set out on any hike, it’s a good idea to check for any recent updates at AllTrails to ensure that it is open and ready for hikers.
Parking
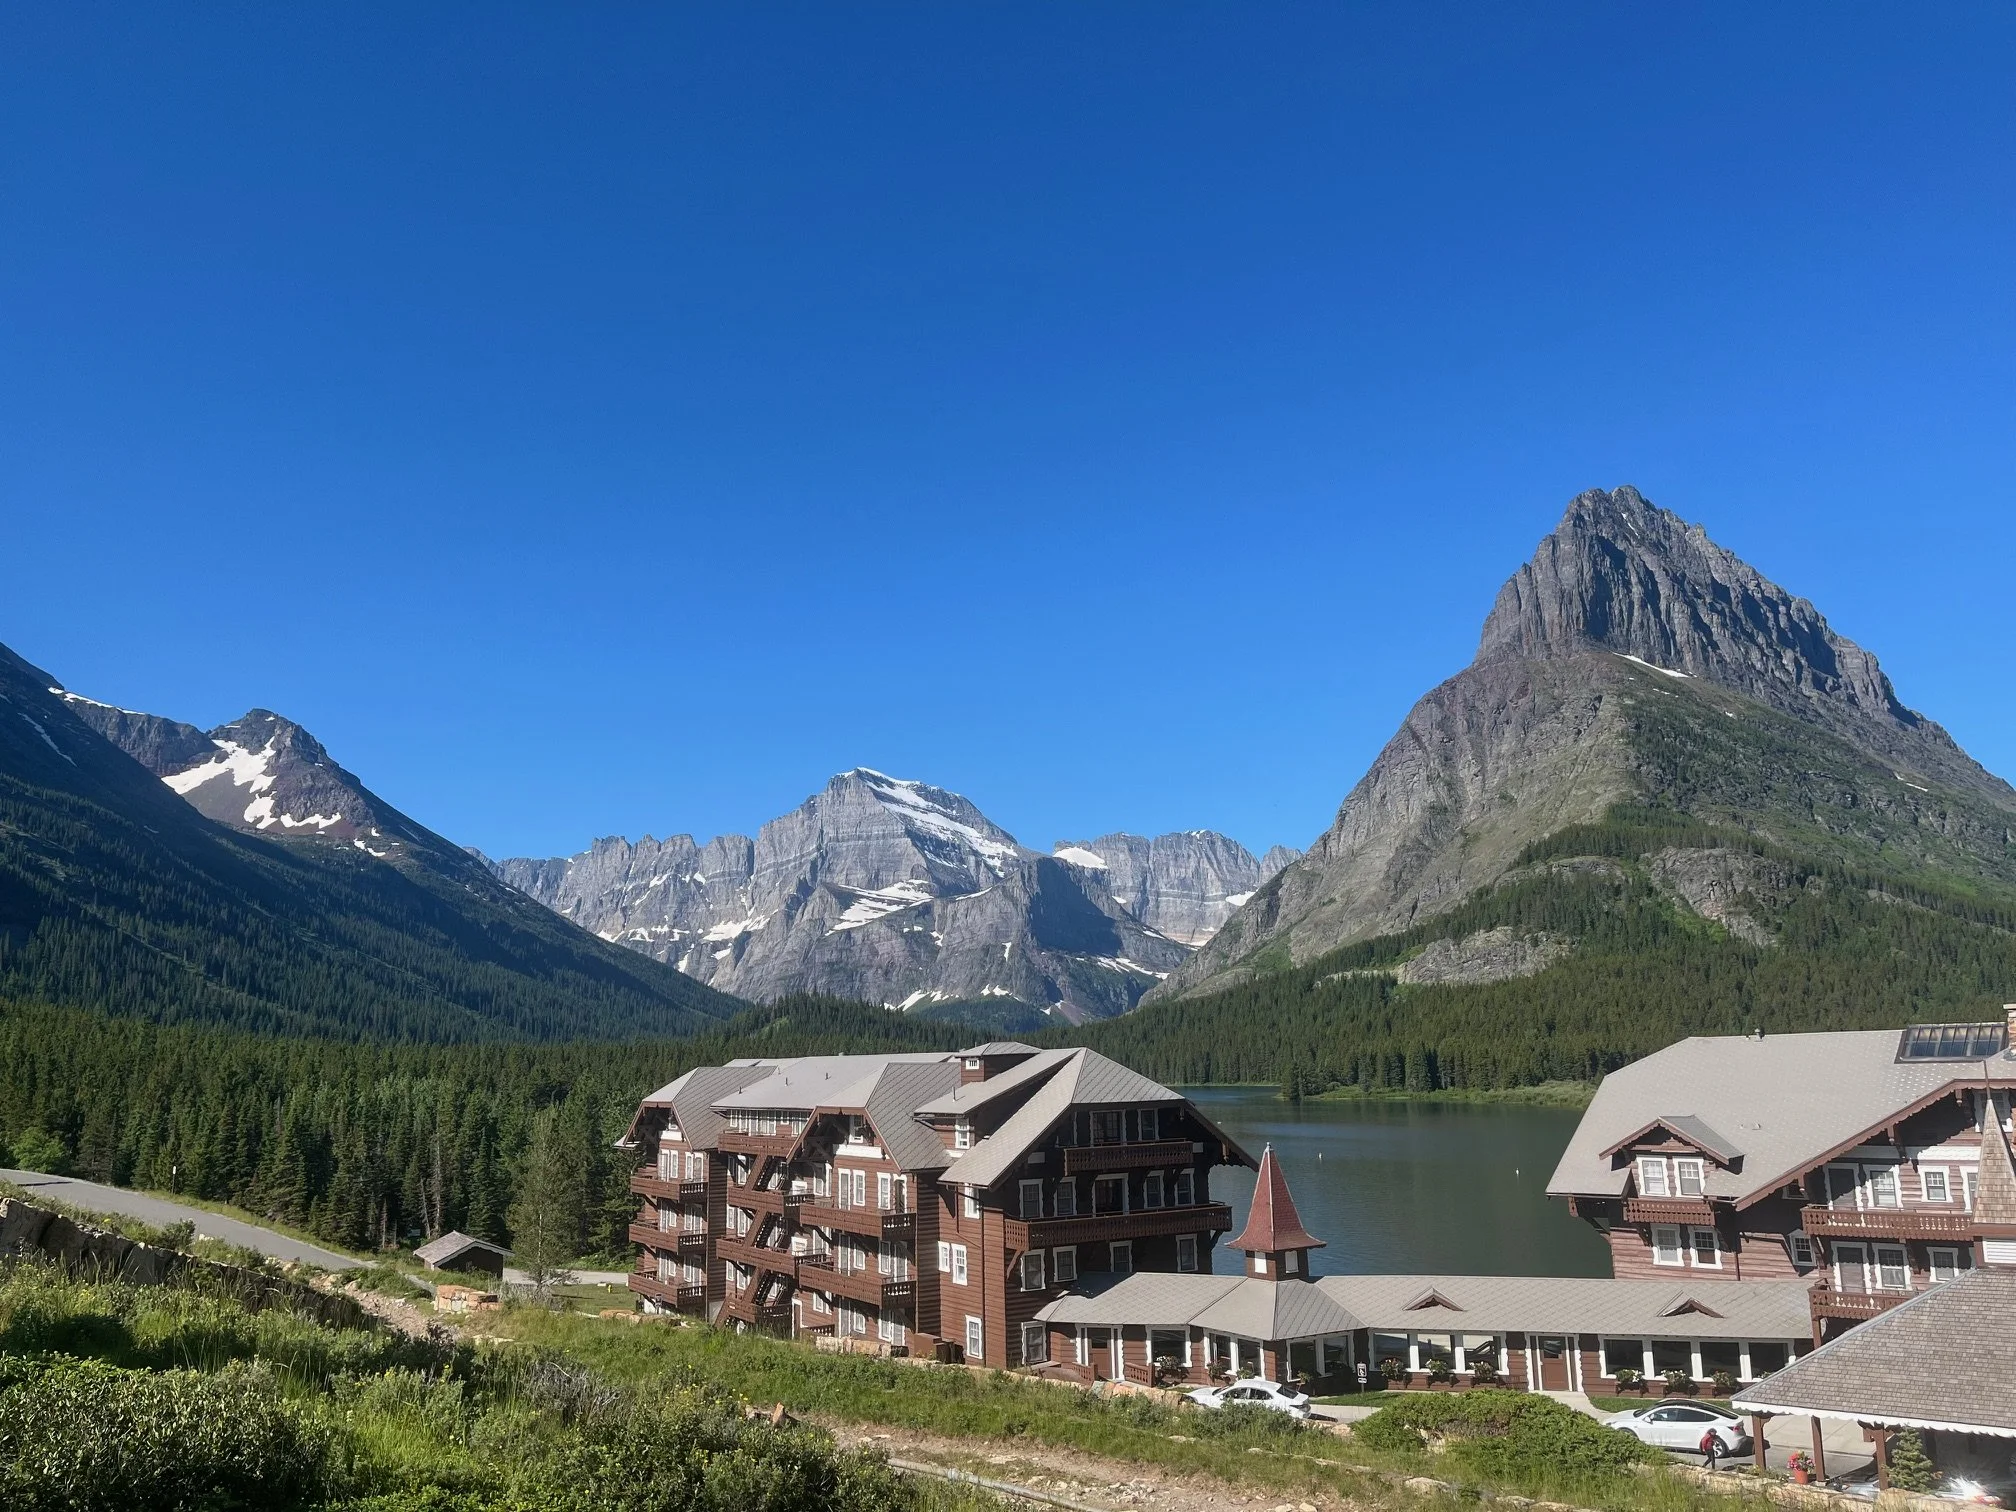
The Many Glacier Hotel and Swiftcurrent Lake beyond
You can find parking for the Grinnell Lake Trail at the Many Glacier Hotel.
Parking is free, and it is usually fairly easy to come by, though the earlier you can get to this parking area in the morning, the better off you’ll be.
There are several trailheads and tours in this part of the park, all of which use that same hotel parking, so keep that in mind, too.
Unlike other hikes in Glacier National Park such as Trail of the Cedars, where the parking area is steps from the start of the trail, you’ll need to park behind the hotel, descend the large hill near the valet area, and then either walk around the hotel or walk through it to get to the trailhead.
There is no public transportation to this part of the park, so you will need to ensure that you have a rental car to fully explore Glacier National Park.
Entrance Fees
You will need to pay your entrance fee when you come into this section of the park. There is a staffed ranger kiosk during the day, but if no one is there, you can pay at the self-service box.
If you’ve already purchased an entrance pass elsewhere in the park, it is good for 7 days in any area of Glacier National Park.
Just show your receipt and you’ll be waved through by the ranger.
Learn more about entrance fees, reservations, and all of the ins and outs of the parks with my post on visiting the national parks for beginners!
TIP: If you are planning to visit Yellowstone National Park, Grand Teton National Park, or any other NPS site for the next 12 months after this trip, I HIGHLY recommend getting an NPS annual pass.
These start saving you money after you visit the second park, and we have saved hundreds of dollars in entrance fees on our long road trips this way. Plus, the pass is good for any national park, national battlefield, national monument, or national historic site, so you have more than 400 ways to save.
You can save even more with this national parks annual pass + AllTrails subscription bundle, so you’re ready to explore parks and trails across the U.S.
We get an annual NPS pass every year, and it has saved us hundreds of dollars on our road trips!


The Camping Kiddos make their way through some thimbleberry bushes on the trail.
Is this trail good for kids?
Yes! The Grinnell Lake Trail is an excellent choice for families who want a taste of hiking in Glacier National Park.
Plan your entire family friendly vacation with my guide to Glacier National Park with kids!
The trail is largely flat and well defined, making it easy to follow, even for beginning hikers.
There is a great variety of things to see on the trail as you’ll walk along the shores of 2 lakes (before getting to Grinnell Lake), follow a crystal clear stream, and get to navigate a swinging foot bridge.
Plus, there’s a high chance to getting to see some wildlife here such as one of the many bird species that lives here, or something bigger like an elk, moose, or even bear. The trail’s many, many berry bushes are the perfect snack spot for the park’s wildlife.
My kids and I have done a lot of hiking in Glacier National Park, and this trail remains one of our favorites thanks to the multiple ways you can choose to experience it and the awe-inspiring views at the end!
Find tips for making hiking fun for kids and get a free printable nature scavenger hunt here.
Grinnell Lake Trail vs. Grinnell Glacier Trail
So many hiking options!
In this part of the park, there are two very similarly named trails with vastly different hiking experiences.
Grinnell Lake Trail—the one I’m focusing on in this post—is an easy out and back trail that’s perfect for families or hikers who want views without a lot of prep.
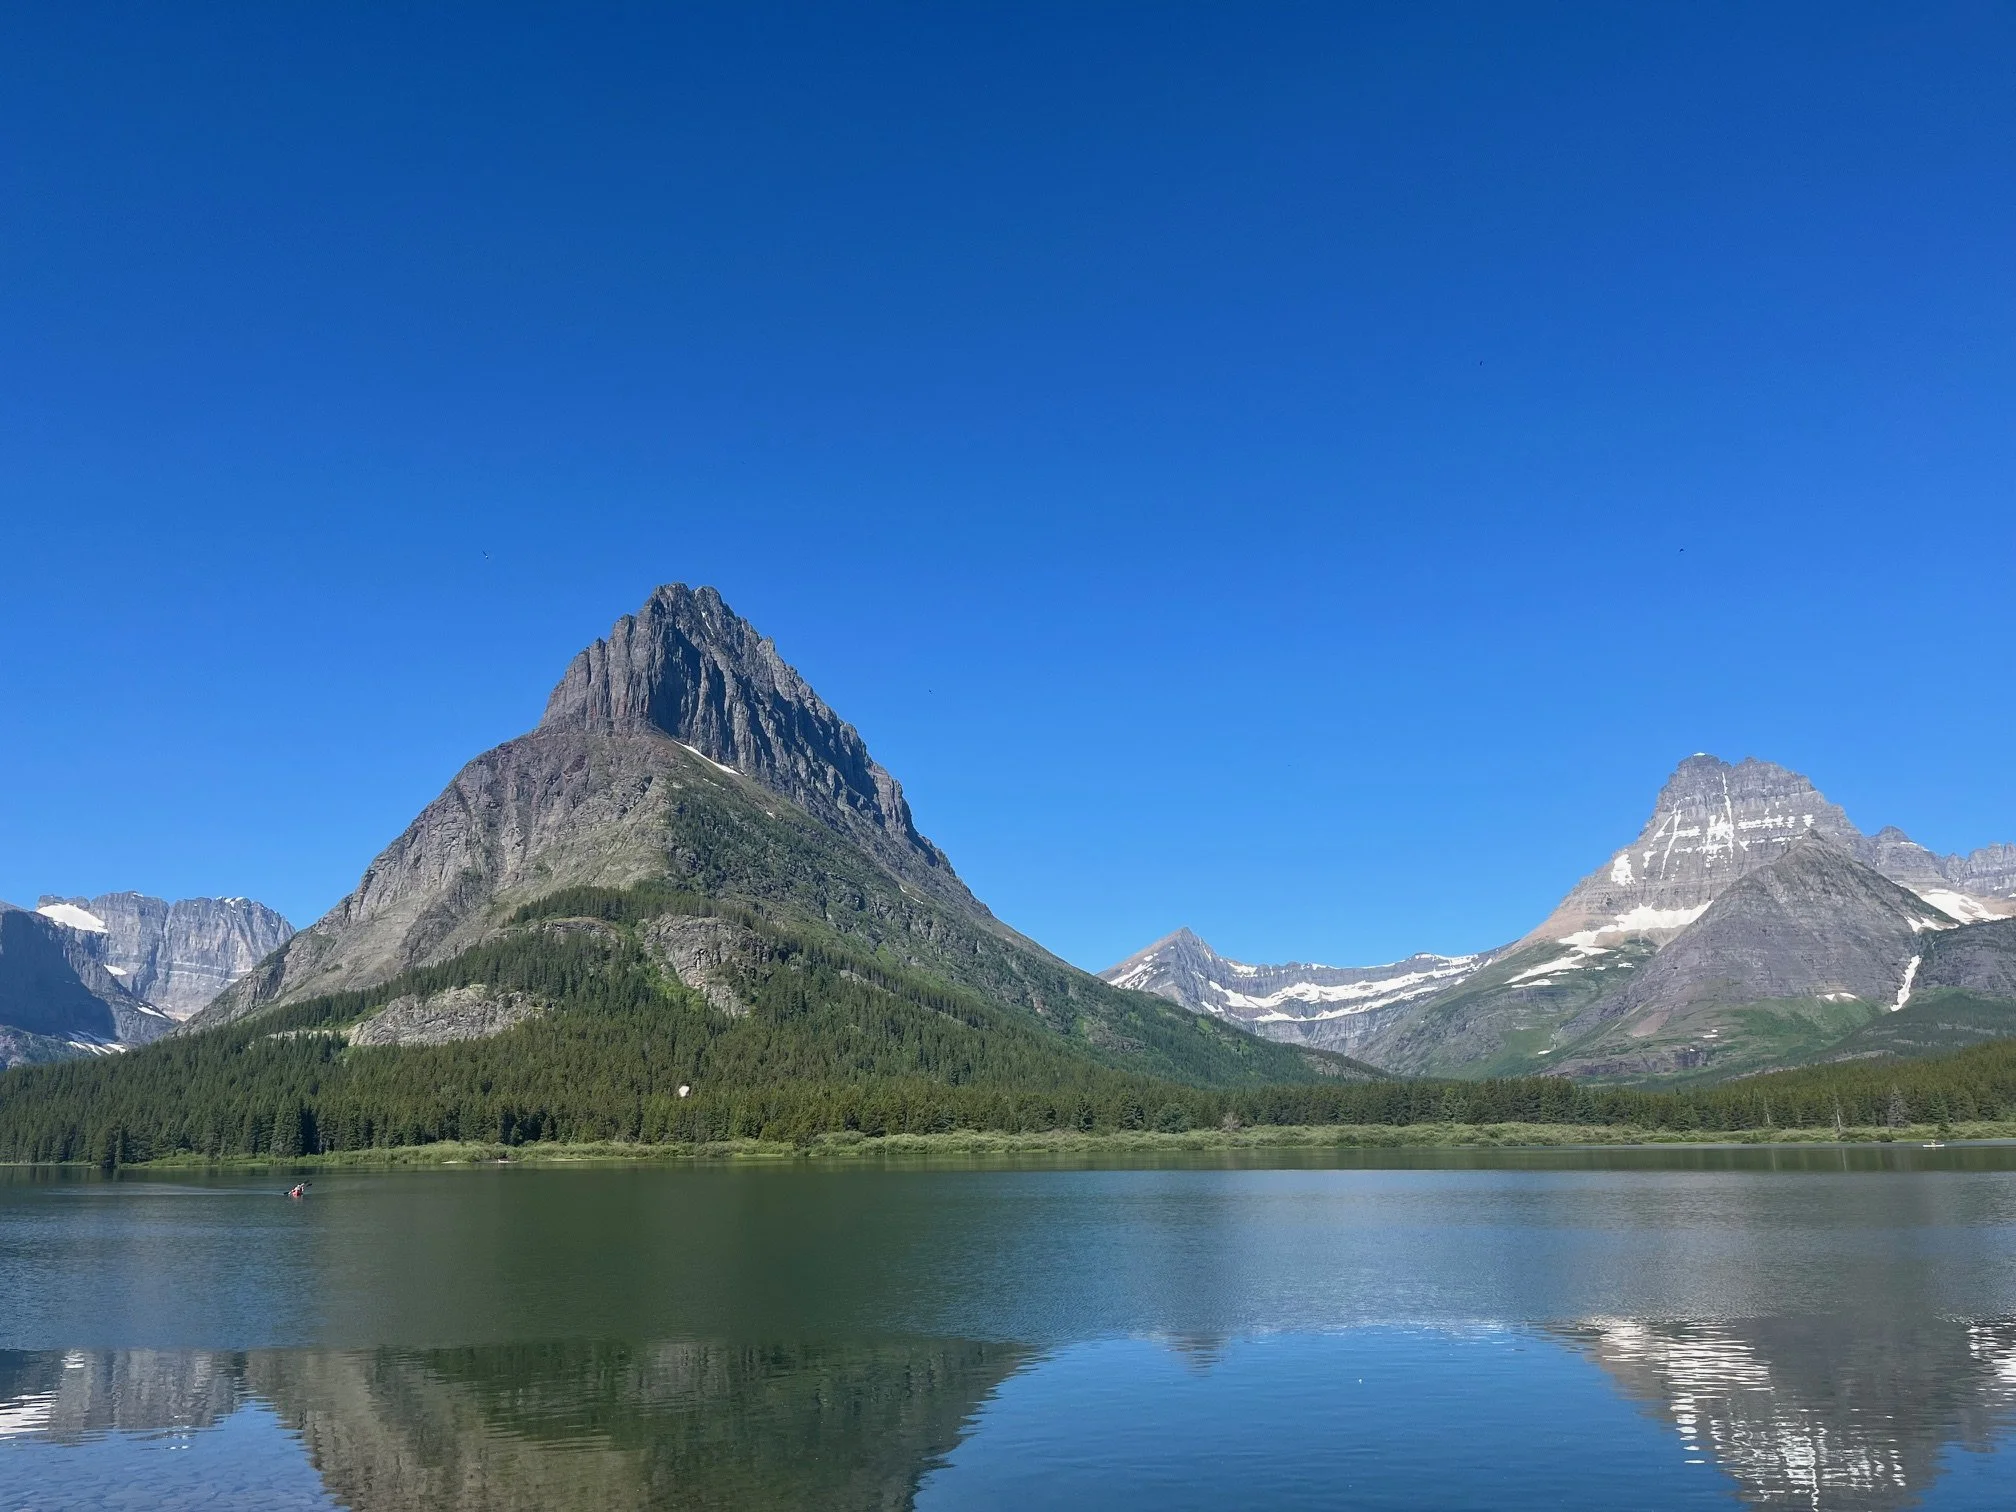
This trail takes hikers to the lake fed by Grinnell Glacier. It is a brilliantly blue lake and well worth the hike to get here.
You can’t see the glacier well from this perspective as you’re below where the glacier rests.
Grinnell Glacier Trail, on the other hand, is more difficult and is appropriate for an intermediate to advanced hiker, thanks to its elevation gain and steep drop-offs.
On this trail, you’ll be able to look down onto the glacier, which makes this hike one of the best if you’d like to see the park’s namesakes.
These two trails are easily confused thanks to their similar names, so be very sure which you’re taking so that you get the hiking experience you want!
Plan more of your Glacier National Park vacation with these posts:
Grinnell Lake Trail Guide
How to Get to Grinnell Lake

PIN ME!
There are 2 different ways to get here, and which approach will determine how long you hike.
The first way is to take one of the hiking trails from near Many Glacier Hotel and complete the entire trail on foot.
Doing so means you’ll be hiking for 6.8 miles round trip.
My husband and 11-year-old did this version of the experience and had a great time.
The second way is to take the Many Glacier Boat and Hiking Tour run by the Glacier Boat Company.
This experience includes 2 boat rides from the Many Glacier Hotel on both Swiftcurrent Lake and Lake Josephine.
Taking the boats cuts down your hiking time to a short 1/4 mile trail between the two lakes, and then 1.8 miles out and back to Grinnell Lake from the Lake Josephine dock.
If you are traveling with younger kids, inexperienced hikers, or hikers with mobility issues, the boat tour is a great way to cut time and distance from the hike while still getting to see the lake.
Grinnell Lake Trail, Step-by-Step

You’ll follow Cataract Creek towards the end of the hike.
Let’s get to Grinnell Lake!
In this section, I’m sharing exactly what to expect at every turn of the trail. You’ll find details on both the longer hike and the shorter boat-hike combination experience.
Both versions are easy and nearly flat. The majority of the elevation happens slowly with one slight hill towards the end of the hike near the lake.
Ultimately, the biggest difference is how long you’d like the overall hike to be.
Whether you’re planning to take the boat tour or do the longer hike, you’ll start at the front of the Many Glacier Hotel.
The view of Swiftcurrent Lake from the front of Many Glacier Hotel; the trailhead will be to your left.


The First Leg of the Hike
Those taking the boat tour will board at the small dock, while those doing the longer, 6.8 mile hike will make their way onto the Swiftcurrent Lake Trail. You can find the trailhead to the left of the hotel if you’re standing with Swiftcurrent Lake in front of you and the hotel behind.
The boat tour guests will putter across the lake with their captain/guide, while hikers follow the left bank of Swiftcurrent Lake.
The trail here is very flat and easy to follow, and you should be able to see the lake (and any of the tour boats on it) through the foliage.
Around half a mile into the hike, you’ll pass four smaller buildings, which are for the NPS employees. Keep following the lakeshore; just beyond the cabins, you’ll hike along a small cove.
The Trail Splits
Continue following the Swiftcurrent Lake Trail south until you see a spur trail appear on your right.
If you follow that spur trail to your right, you’ll cross a wooden footbridge over the small river that flows between Swiftcurrent Lake, Stump Lake, and Lake Josephine.
The spur trail is where you’d meet up with the boat riders as they cross from their first boat to the second via a short section of the North Shore Josephine Lake Trail.
My son hiking on the section of trail between Swiftcurrent Lake and Lake Josephine
If you’d like to hike along Lake Josephine on the right shore, take the spur trail past the Morning Eagle dock, continue along the shore, and then loop around the bottom of Lake Josephine to the dock there.
Otherwise, you’ll continue on the trail you’ve been on—the Swiftcurrent Lake Trail—which follows the left shore of Lake Josephine.
Both of these options around Lake Josephine end up at the same point, but it comes down to which side of the lake you’d like to experience.
Personally, I think that the views of the lake are better form the North Shore Josephine Lake Trail, but you can’t go wrong with any hiking in Glacier.
Arrival at the Boat Dock
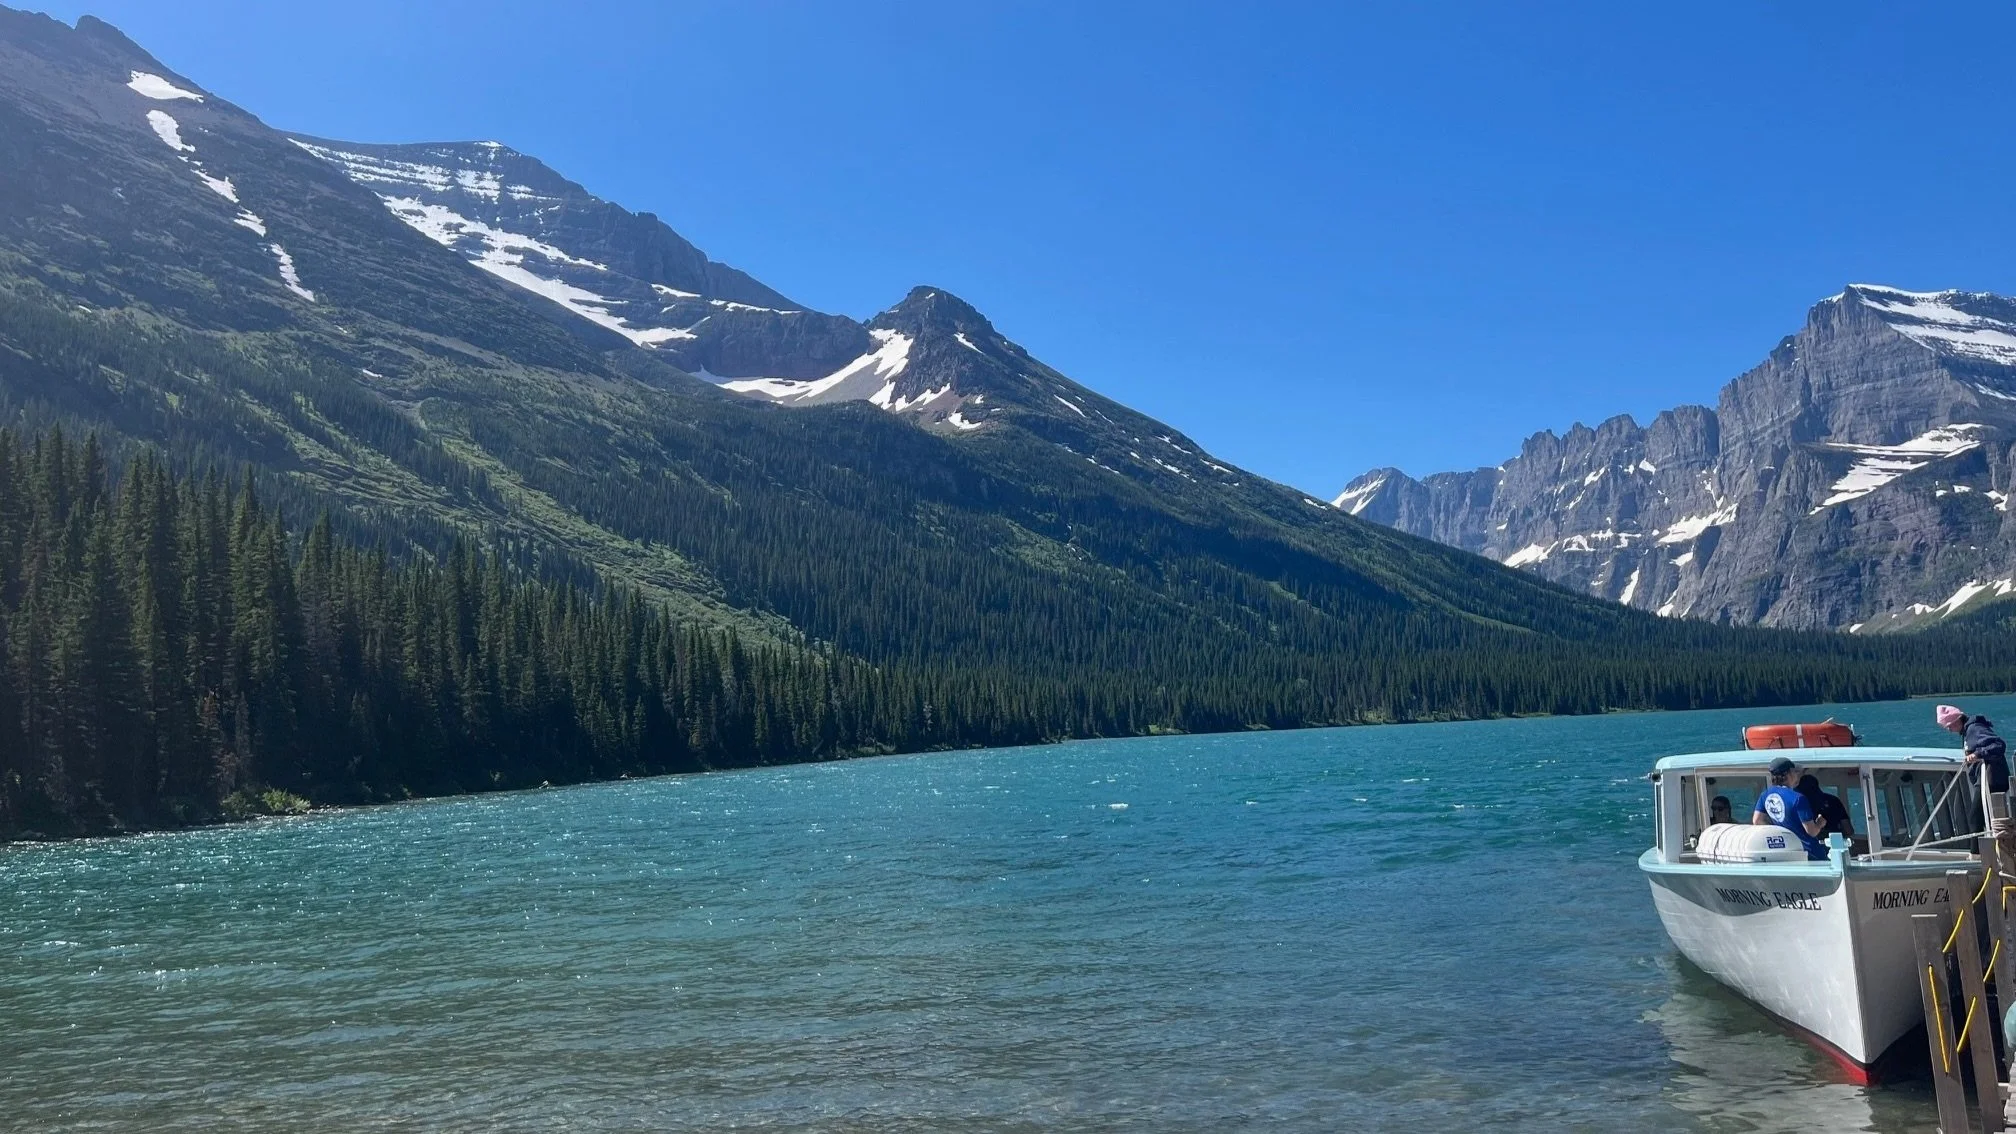
The Glacier Boat Company tour at the Lake Josephine dock
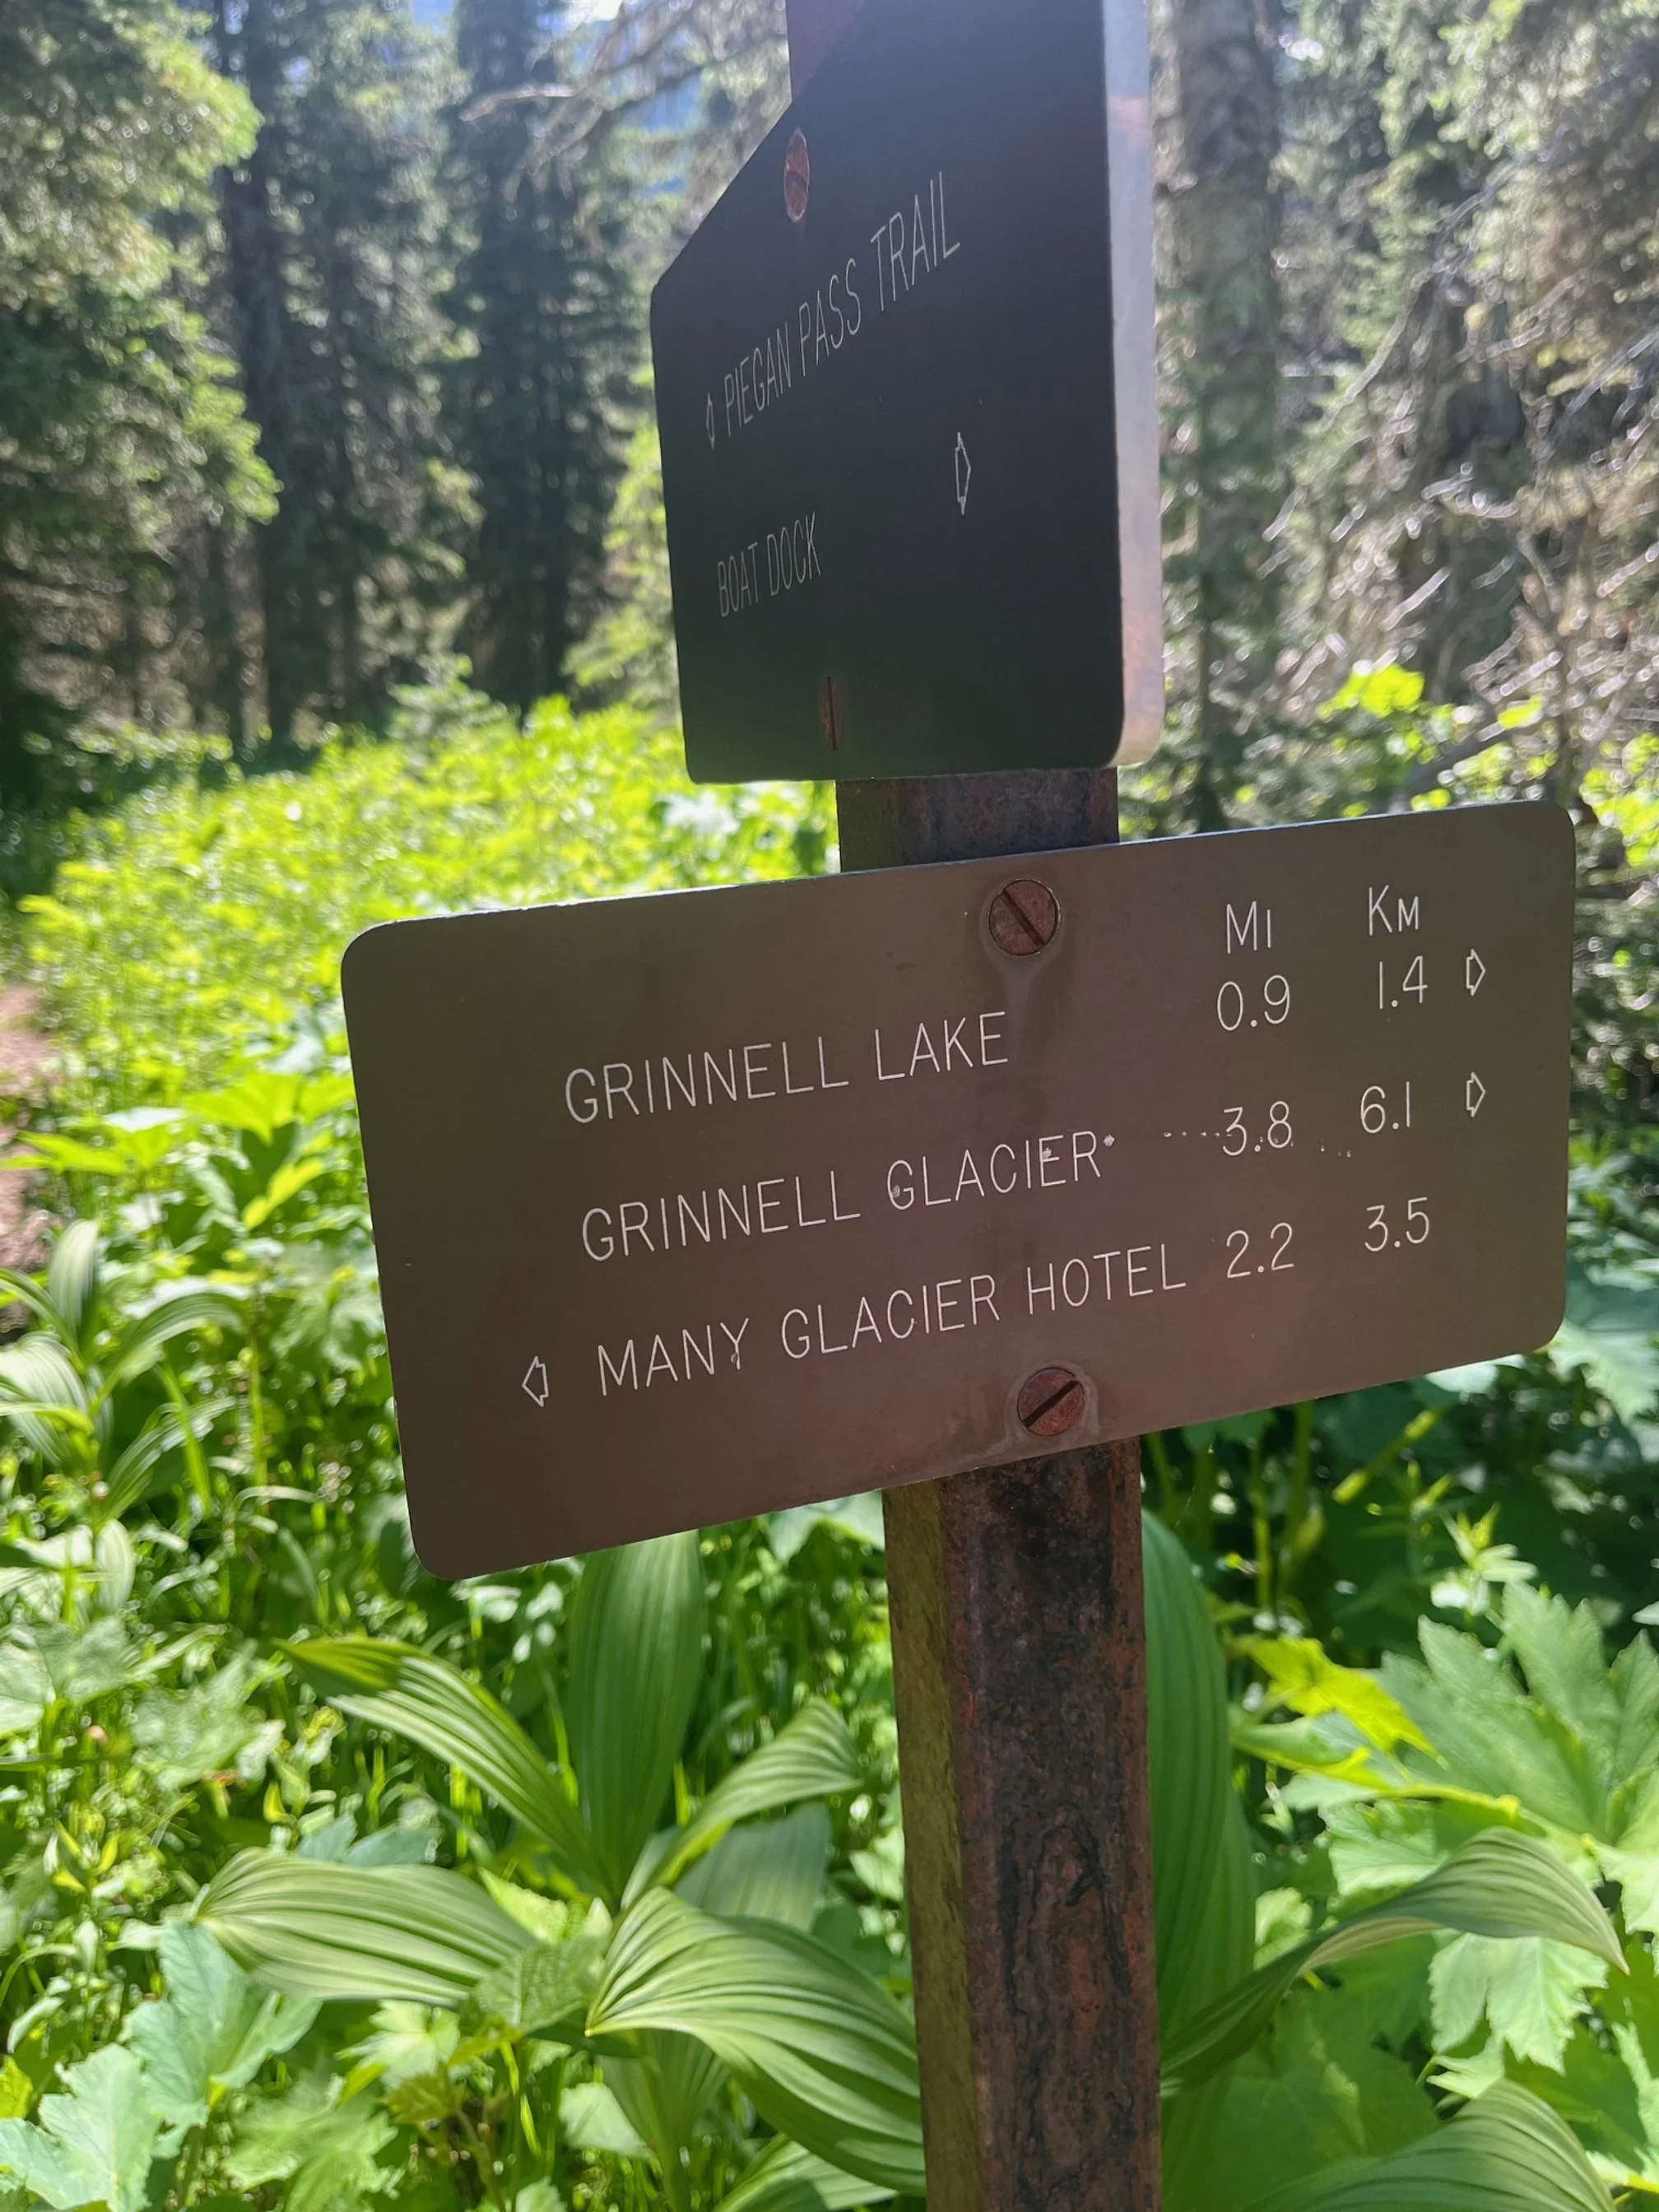
The boat riders and the hikers from both sides of the lake reunite at the small dock at the southern end of Lake Josephine.
From here, you’ll follow the sign to start the Grinnell Lake Trail from the dock area. From this sign, it is 1.8 miles out and back to the lake.
Don’t forget to keep an eye out for moose and bears here. The moose enjoy hanging out in the reeds near the boat dock in the hot summer afternoons!
NOTE: This trail is busy in fits and bursts, thanks to the regular arrival of new hikers via the boats. If you happen to arrive at the Grinnell Lake trailhead near the dock at the same time as a boat tour does, take a break for about 10 minutes to let the group get ahead of you.
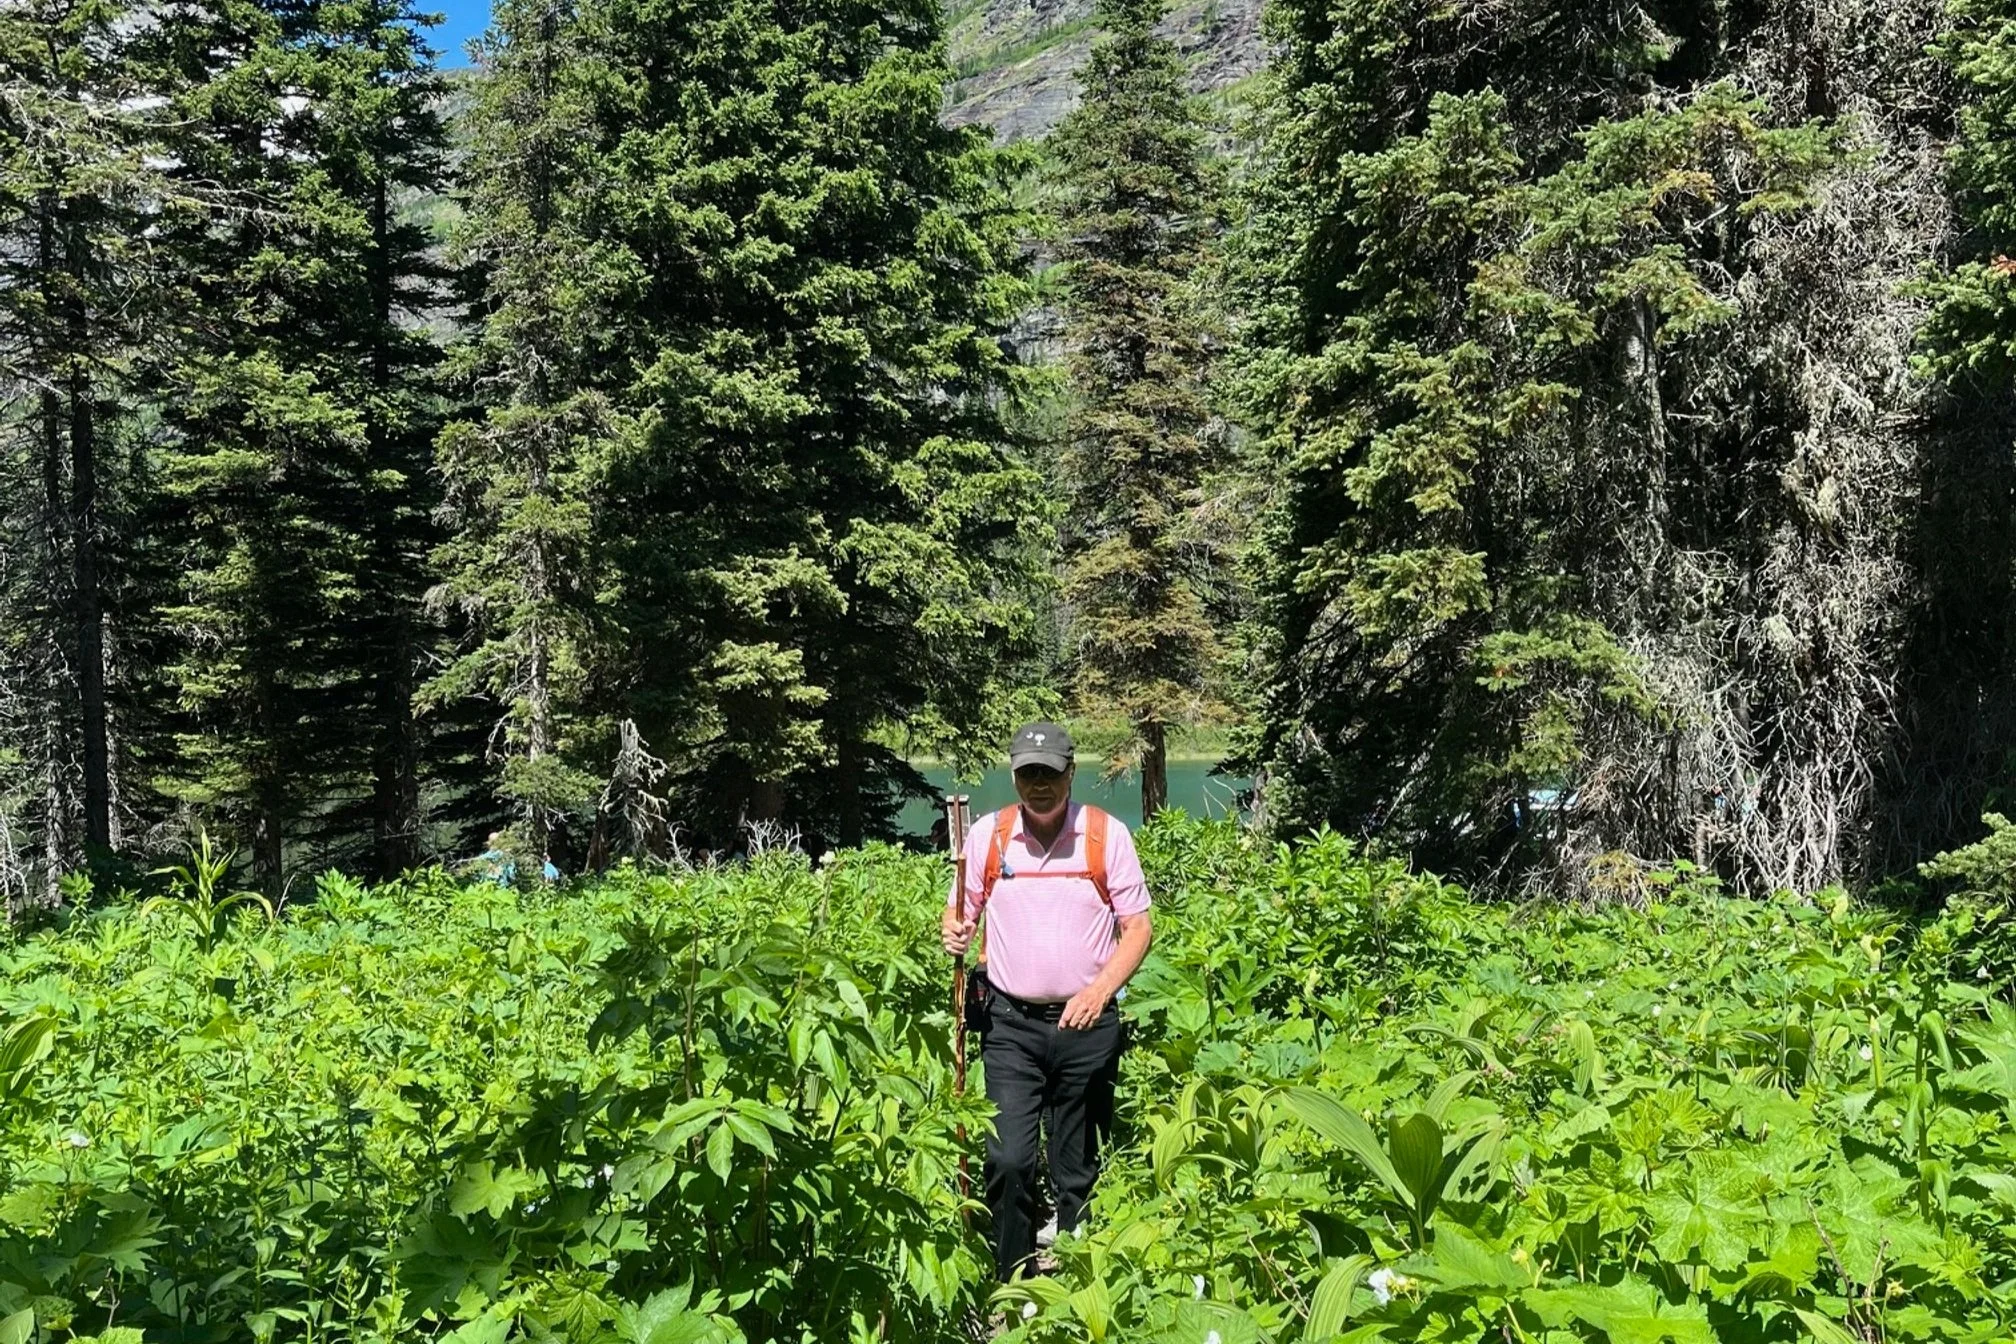
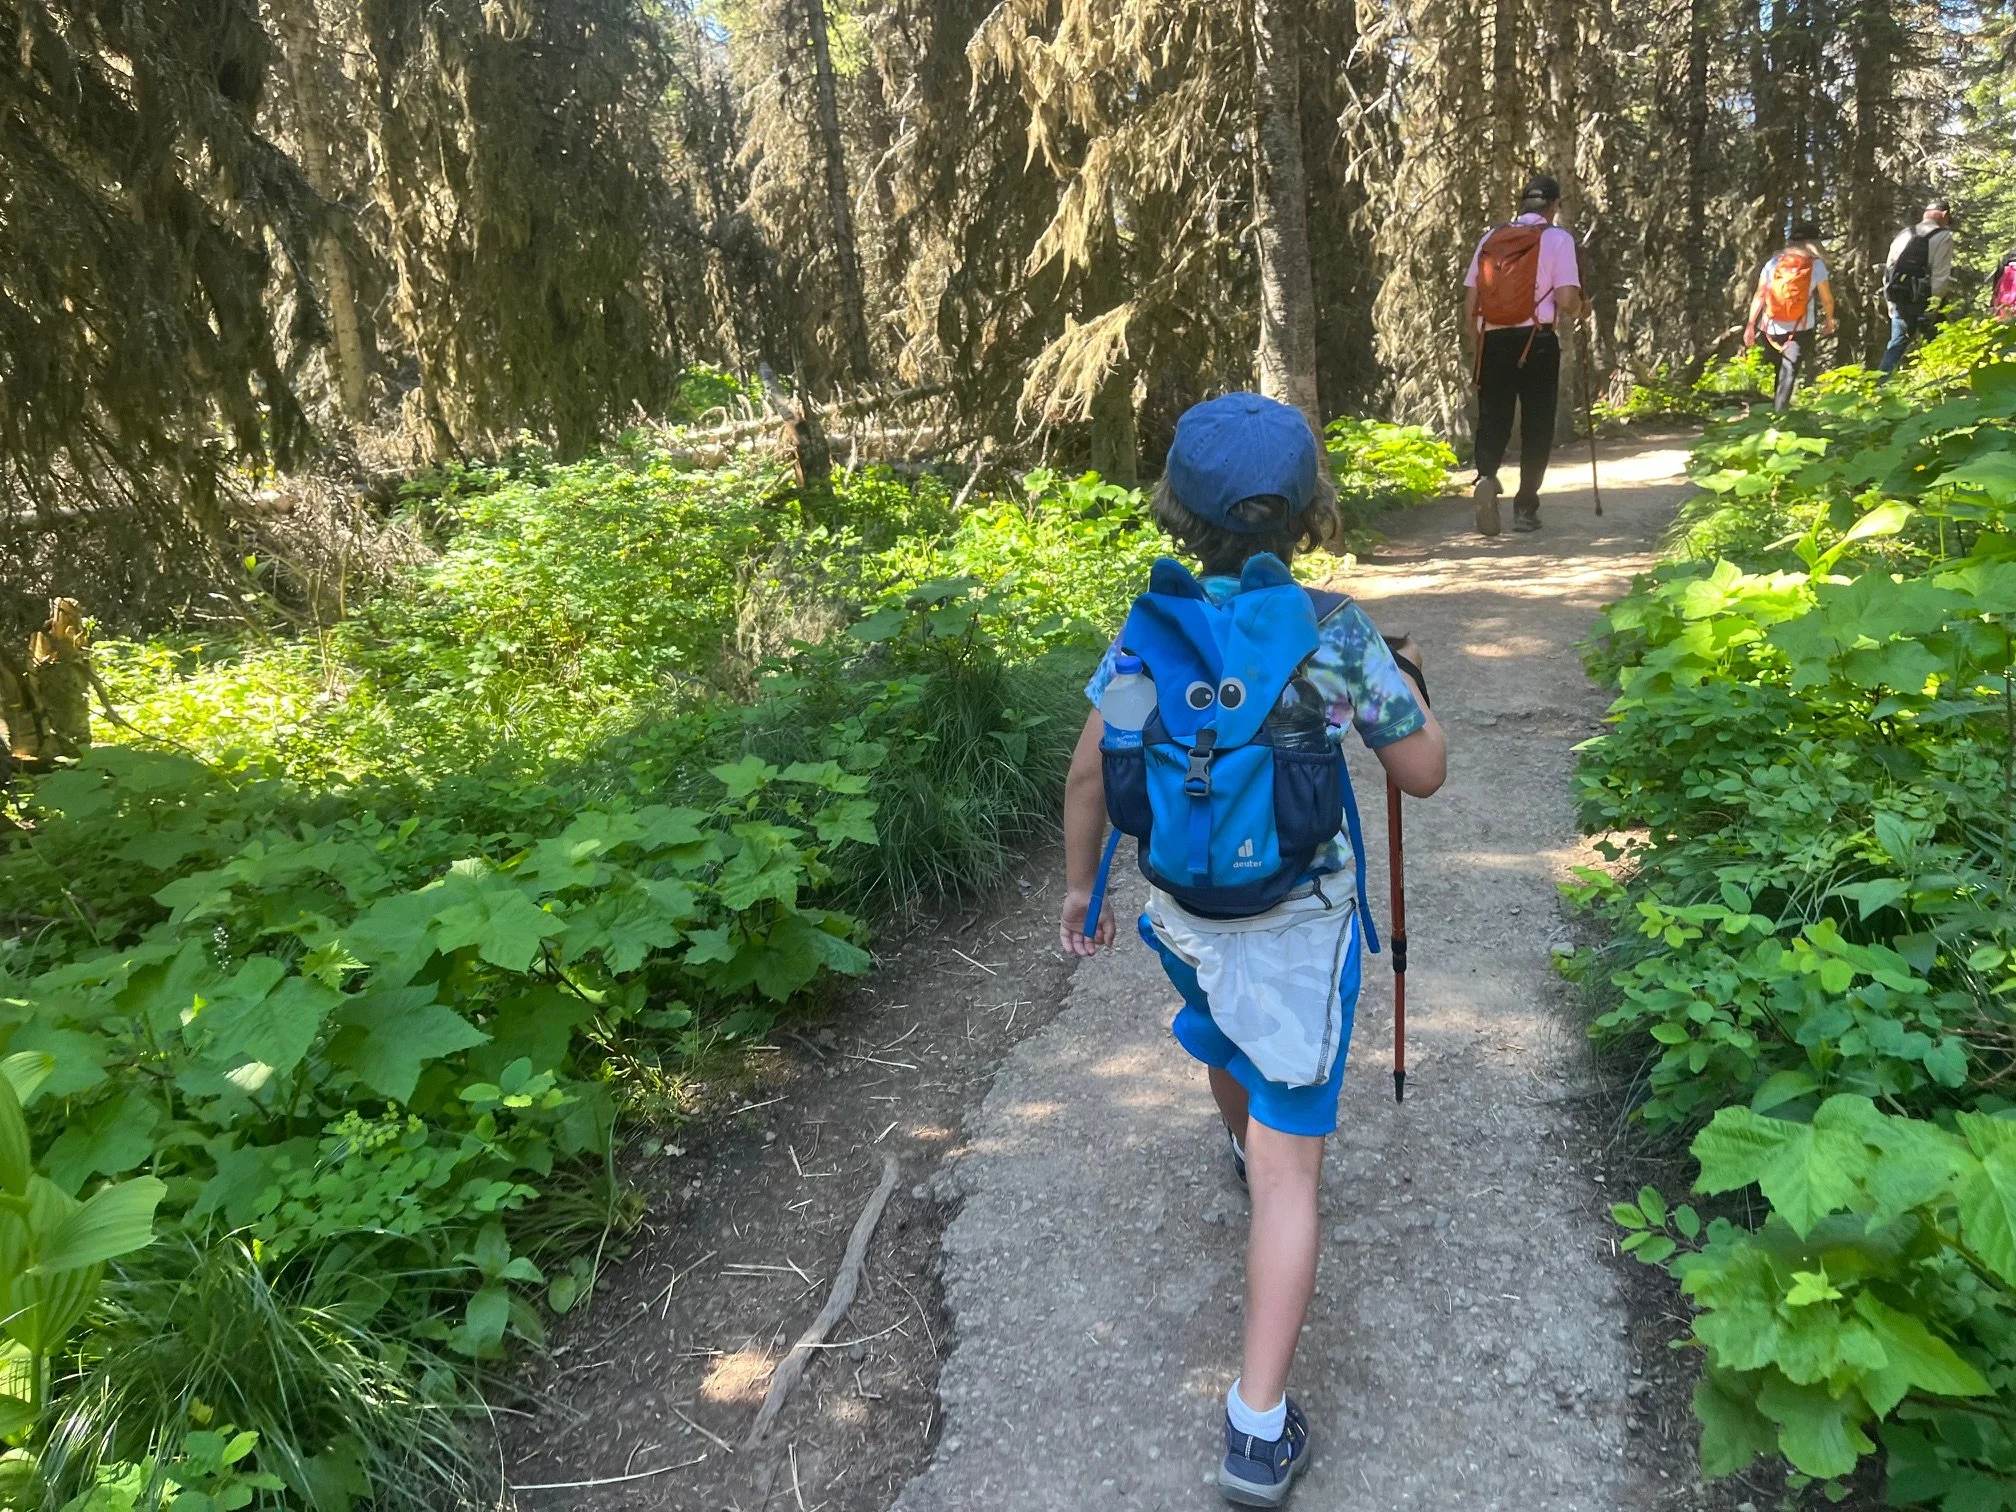
My dad navigates a portion of the trail near the dock that cuts through thimbleberry bushes
As you begin the next section of the hike, you’ll go through a section of forest with thick thimbleberry bushes on both sides of the trail.
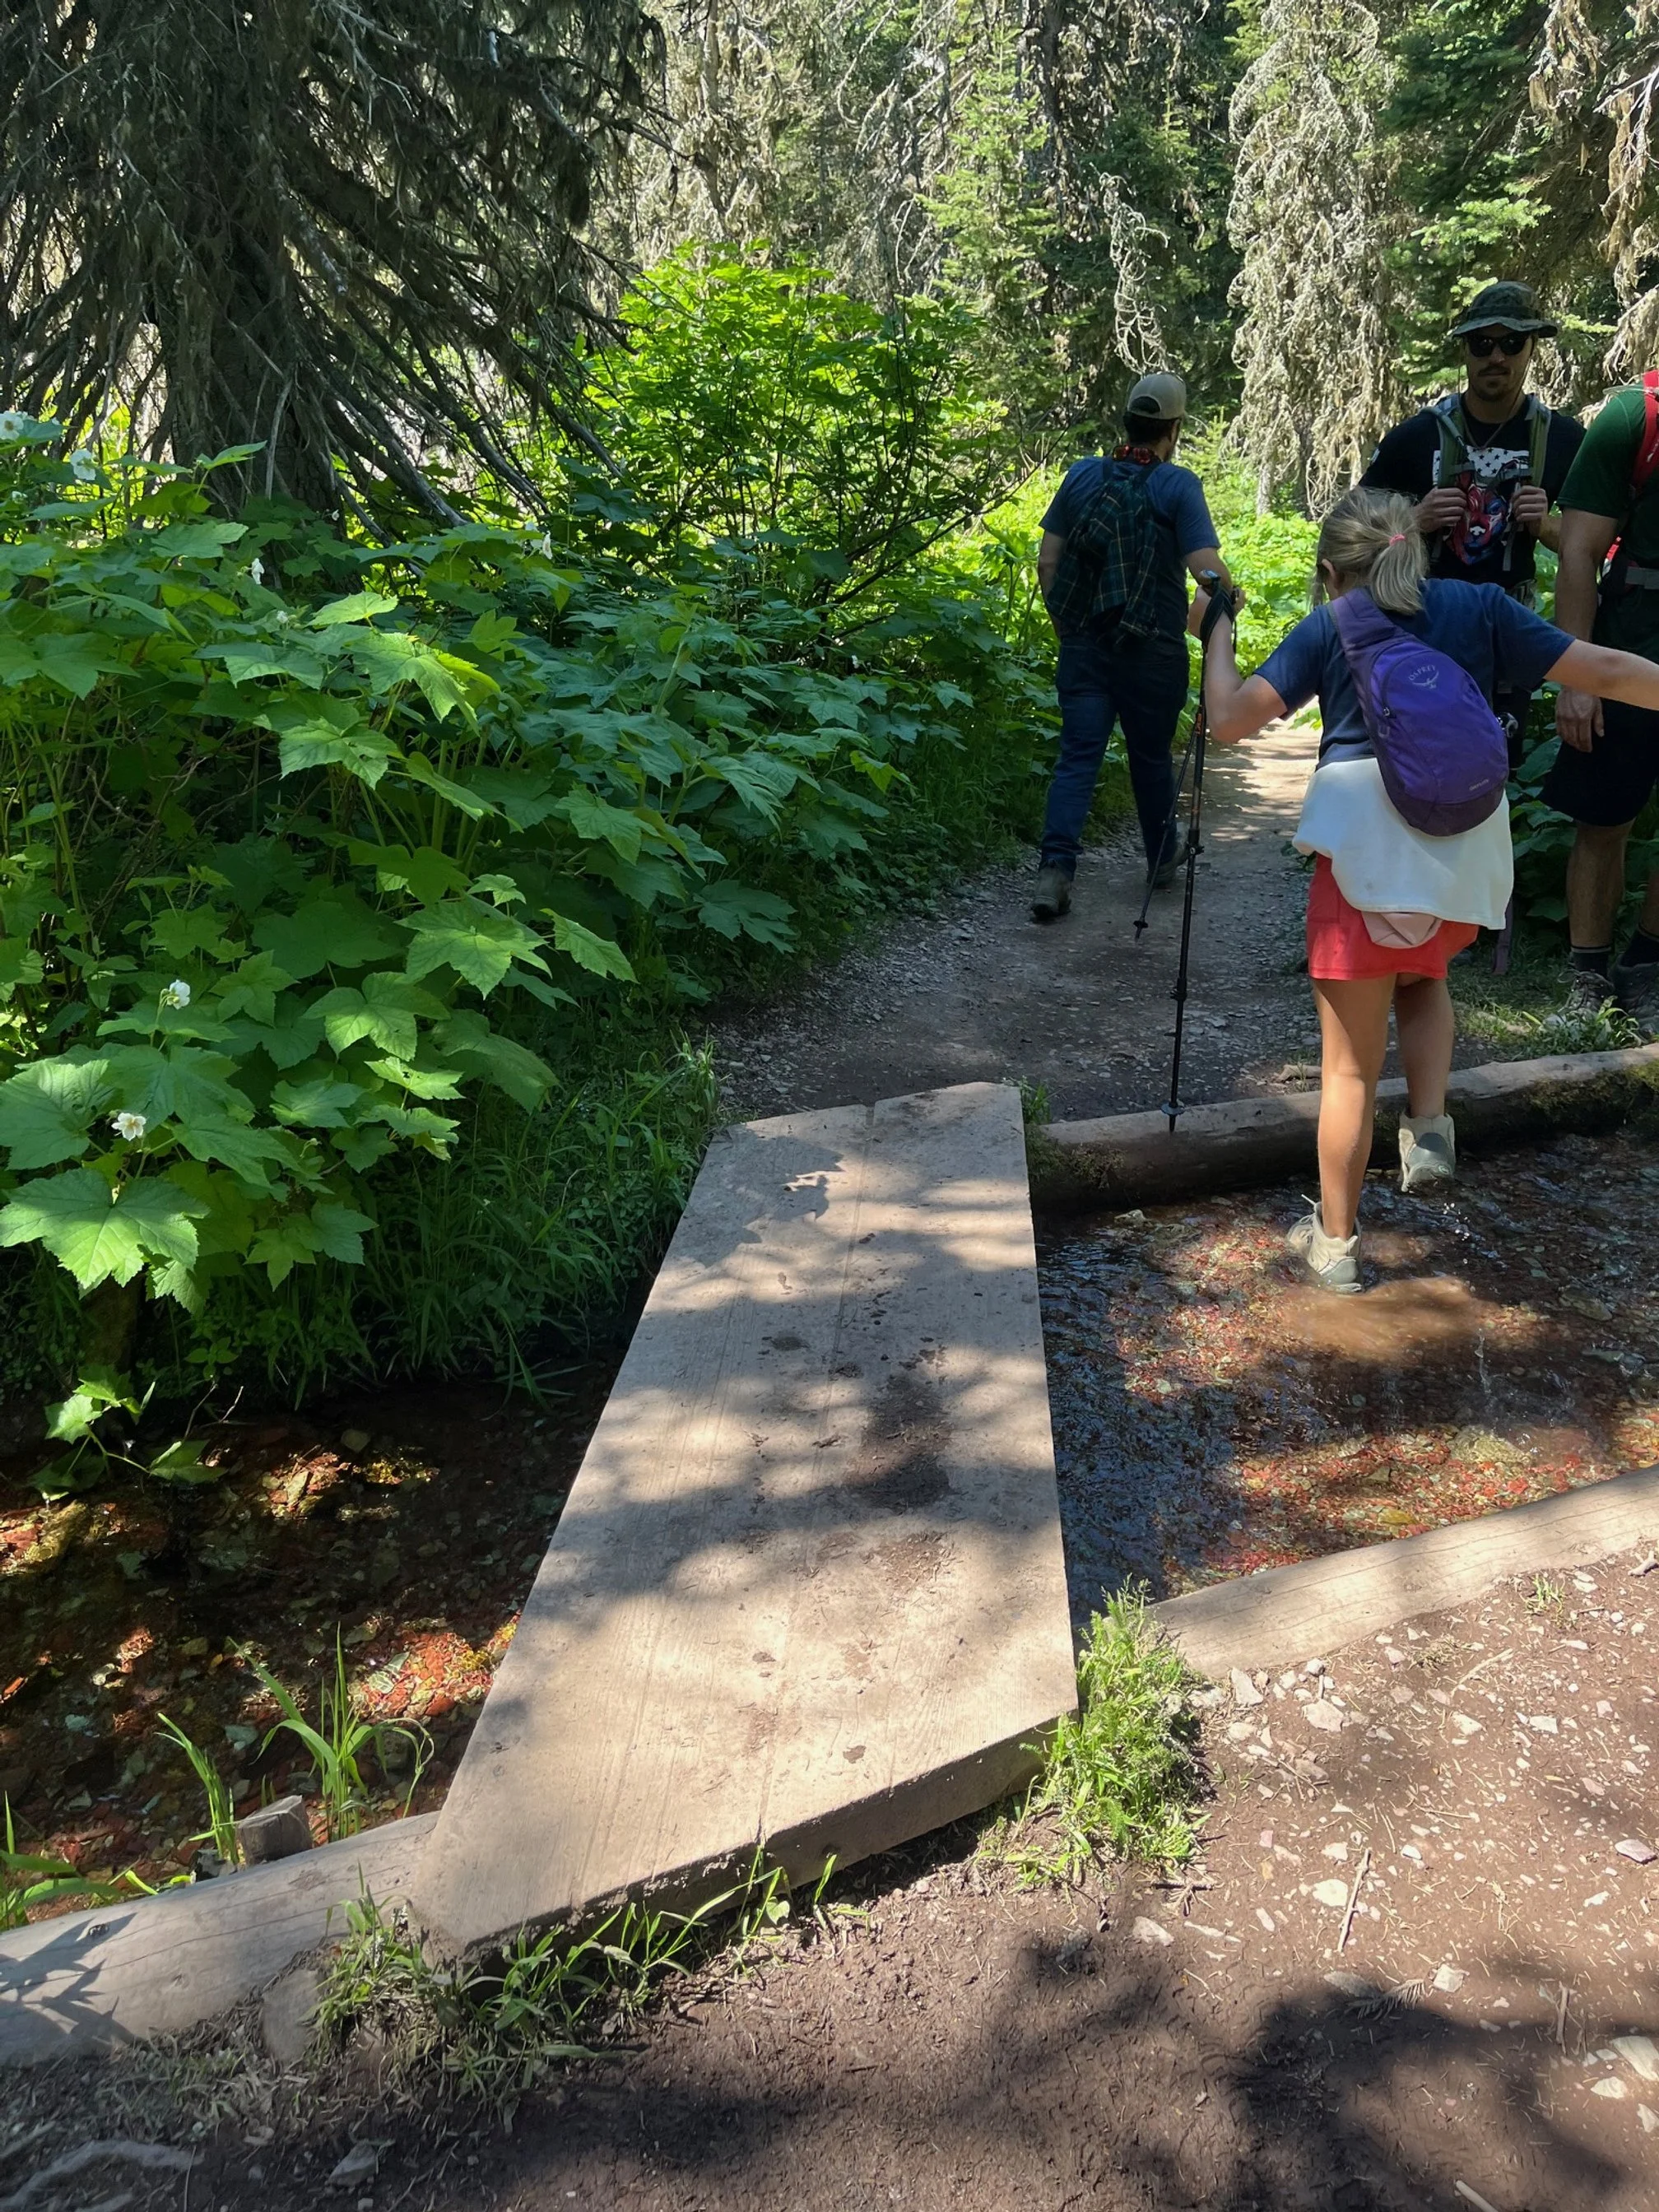
Who needs the provided foot path when there is water to splash in?!
Deer, bears, elk, moose, birds, and other animals like to snack here, so it’s a good place to stay alert if you want to see wildlife.
This is also the busiest part of the trail as a good portion of the people who got off of the boat tour will often hike just a short way into the trail, just to turn around again.
You’ll soon be able to see and hear Cataract Creek to your right, and small tributaries to this river pass across the trail.
Those few areas in these section of trail have stones or boards in place to help you cross, or you may have to jump over the muddy sections.
(Or, if you’re my kids, you just walk right through the streams and then complain about your hiking boots getting wet!)
Unless there’s been a recent downpour, you should be able to navigate these areas without much issue.
The trail here is nearly completely flat and well defined.
About halfway between the dock and Grinnell Lake, you’ll see the one and only bathroom option: 2 very, very, very rustic outhouses.
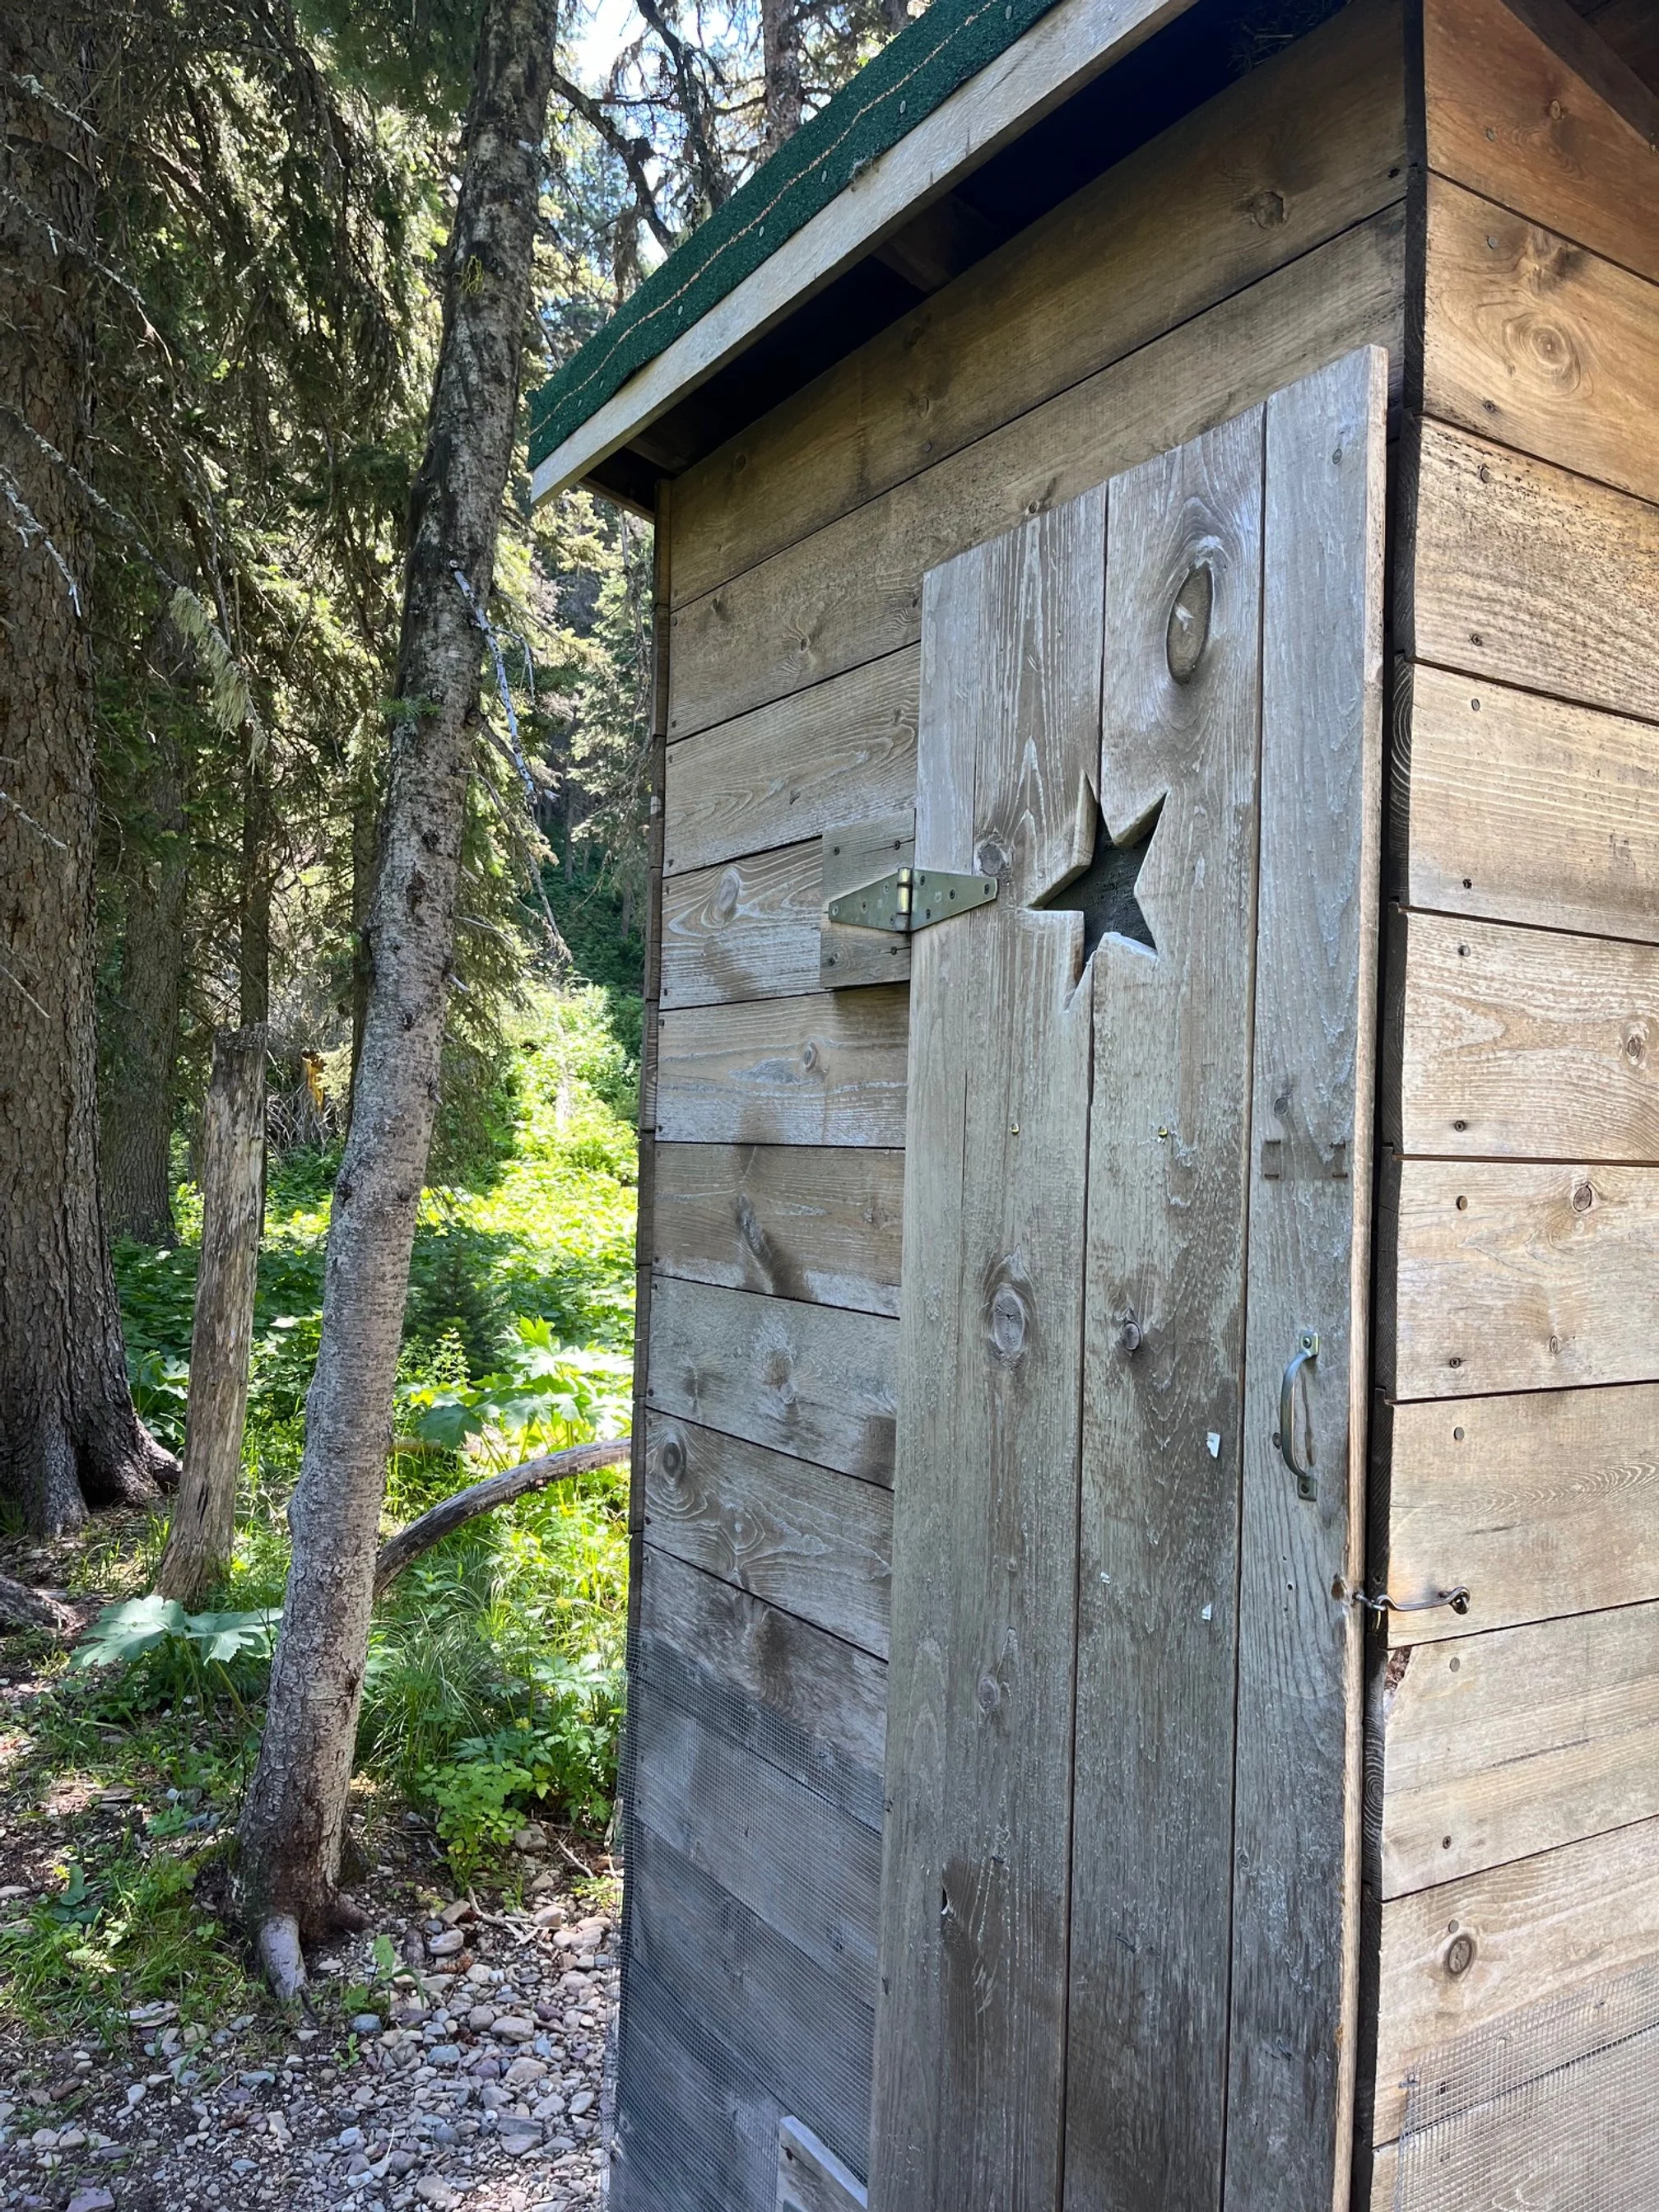
The trail outhouse
I’m not so fancy that I’m above a vault toilet, but these outhouses were rough.
These are so, so dark since the only light coming in is through the tiny cut out on the door.
Thanks to the very little light coming in, I was terrified that a giant spider was going to jump on me at any moment—and I wouldn’t know until I got out of the outhouse. (That’s too much wildlife for me, folks.)
Honestly, peeing in the woods might’ve been better.
Most people would probably go that route if this wasn’t such a heavily trafficked trail.
Plus, the underbrush isn’t tall enough to afford any real privacy, so most adults seemed to opt for the outhouse.
Just know that these are available if you or your kids get really desperate.
Hidden Falls Spur and Cataract Creek Crossing
You’ll know that you’re close to the lake when you come to a little intersection.

My son crosses the Cataract Creek footbridge
Here, you’ll be able to add the Hidden Falls spur trail to your experience if you’d like.
It’s going to be off to the left, and it has a wooden sign indicating the turn off.
Just beyond this spur, you’ll need to walk across a swinging footbridge over Cataract Creek.
It’s best to cross one at a time because of the swing of the bridge.
You’re not particularly high up above the water, but the boards do bounce around enough to be disconcerting.
My younger child wasn’t sure about the bridge, especially since he had to cross on his own, but he watched a couple of other hikers go as he built up his courage.
He ended up doing great, and, on our return trip, didn’t hesitate when it was his turn.
It’s also polite to alternate if there are hikers on the far side of the bridge who need to cross back towards the boat dock.
While we were doing this hike, everyone was patient and alternated between each of the sides of the bridge to ensure we all could get across.
After you cross the bridge, the trail’s elevation begins to climb, but not by much!

You’re ascending more of a large hill than anything else, and you never lose sight of Cataract Creek (slightly) below the trail and to the right.
For those traveling with younger hikers or anyone who’s scared of heights, the trail here is wide and there is a distinct barrier with the underbrush on the side with the slope.
Arriving at Grinnell Lake
You’re almost there!
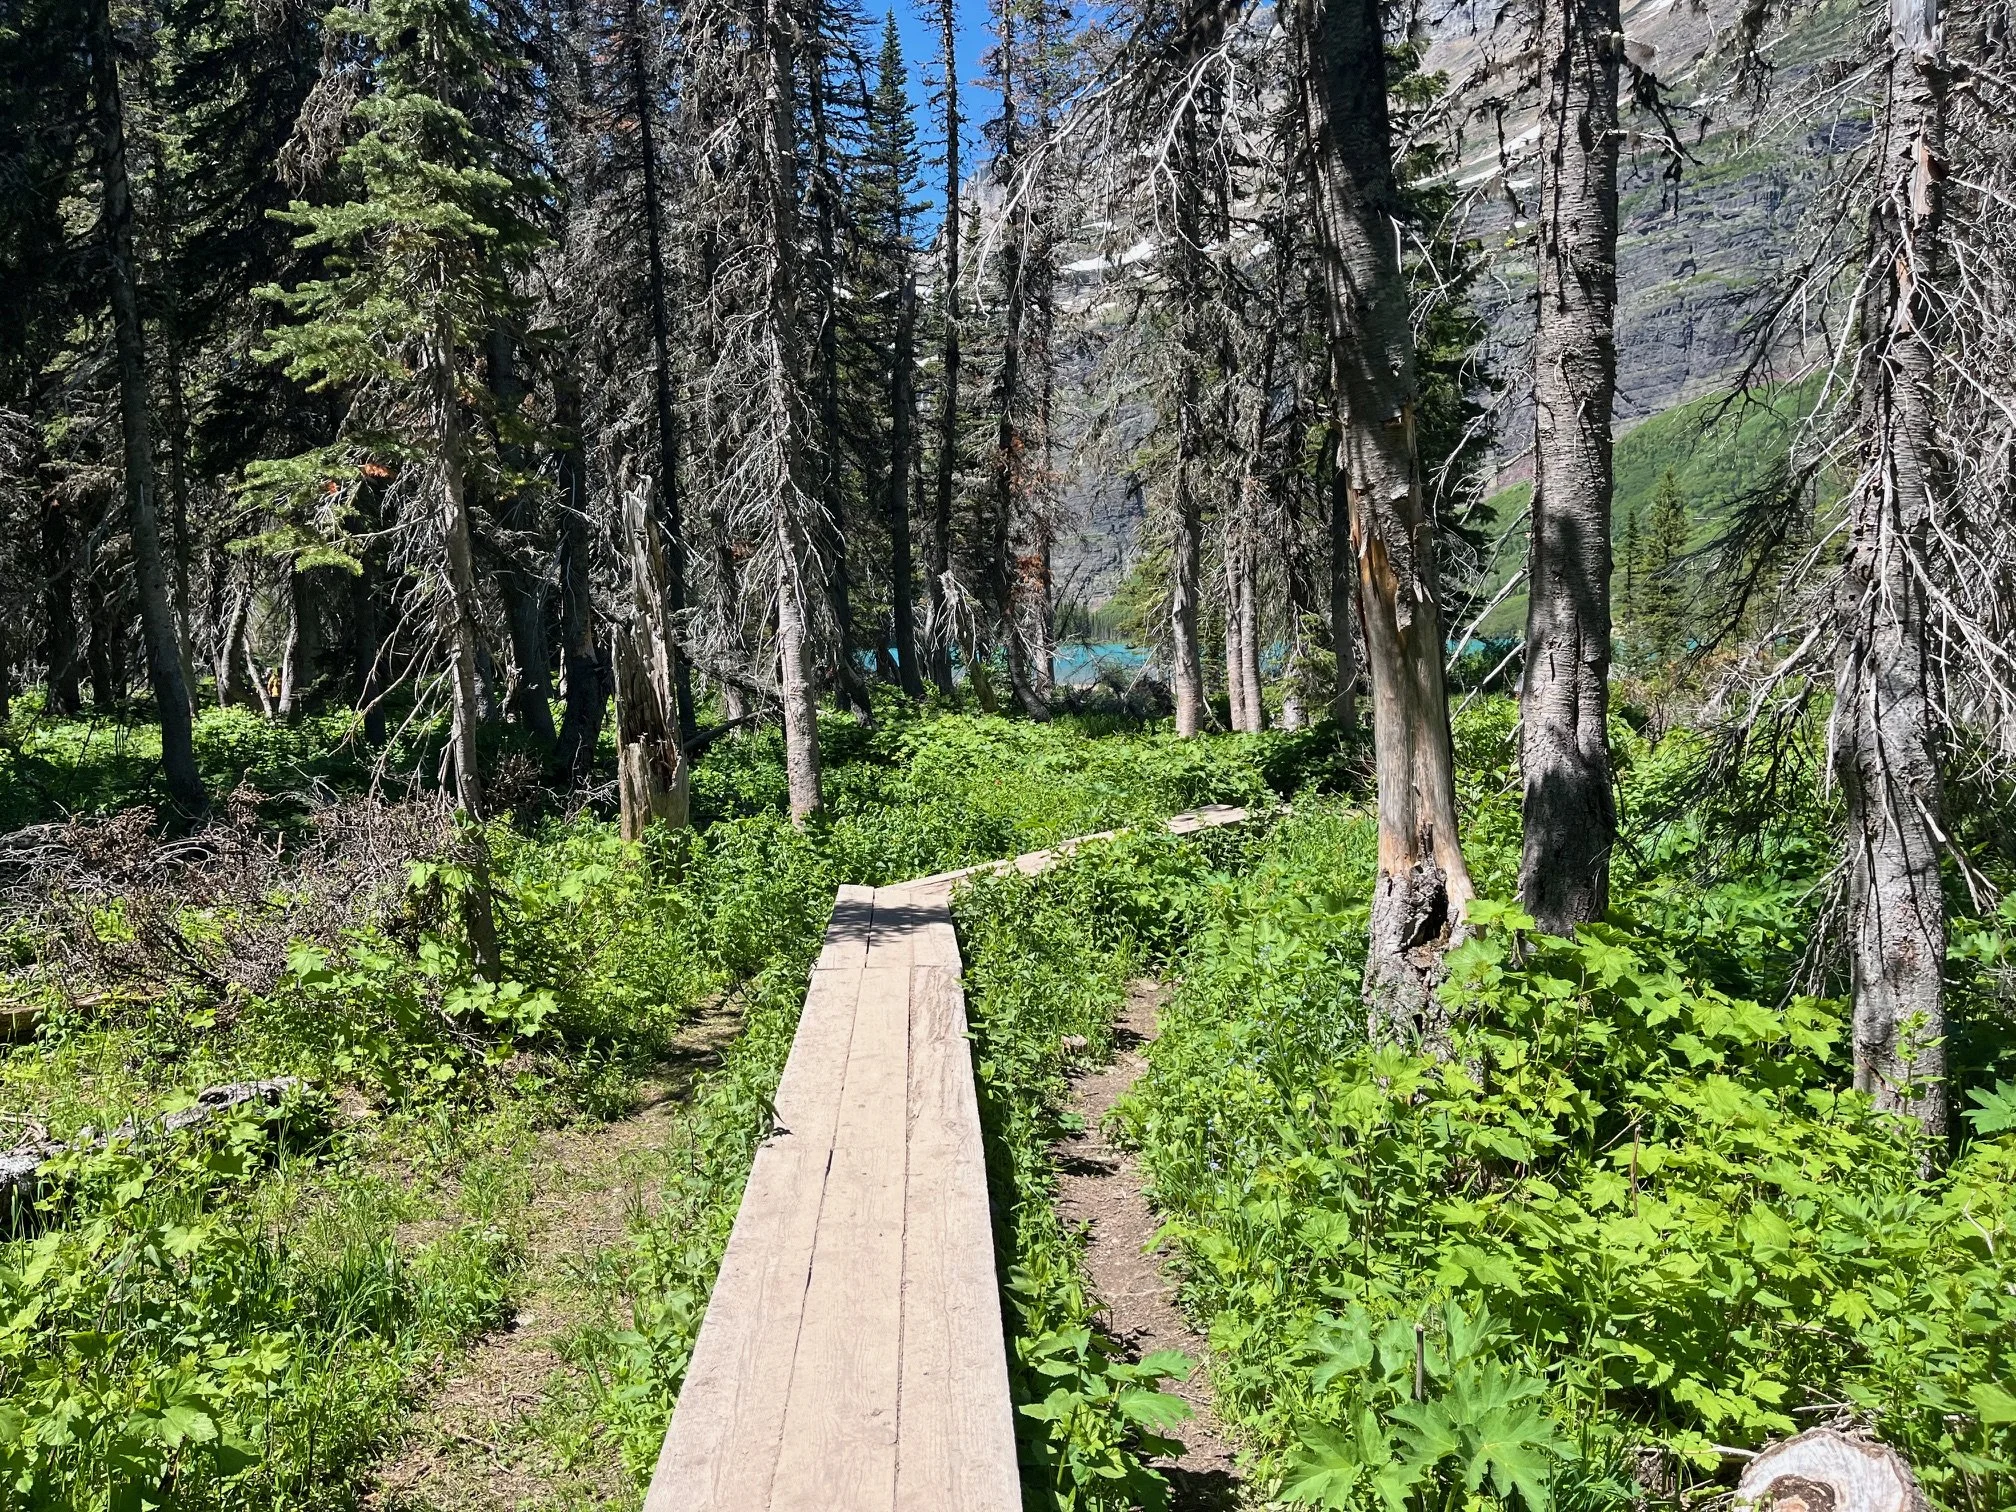
As the trail then descends again, you’ll know you’ve nearly made it to the lake.
The trail here includes a section of boardwalk to get you over the marshier ground as you approach Grinnell Lake.
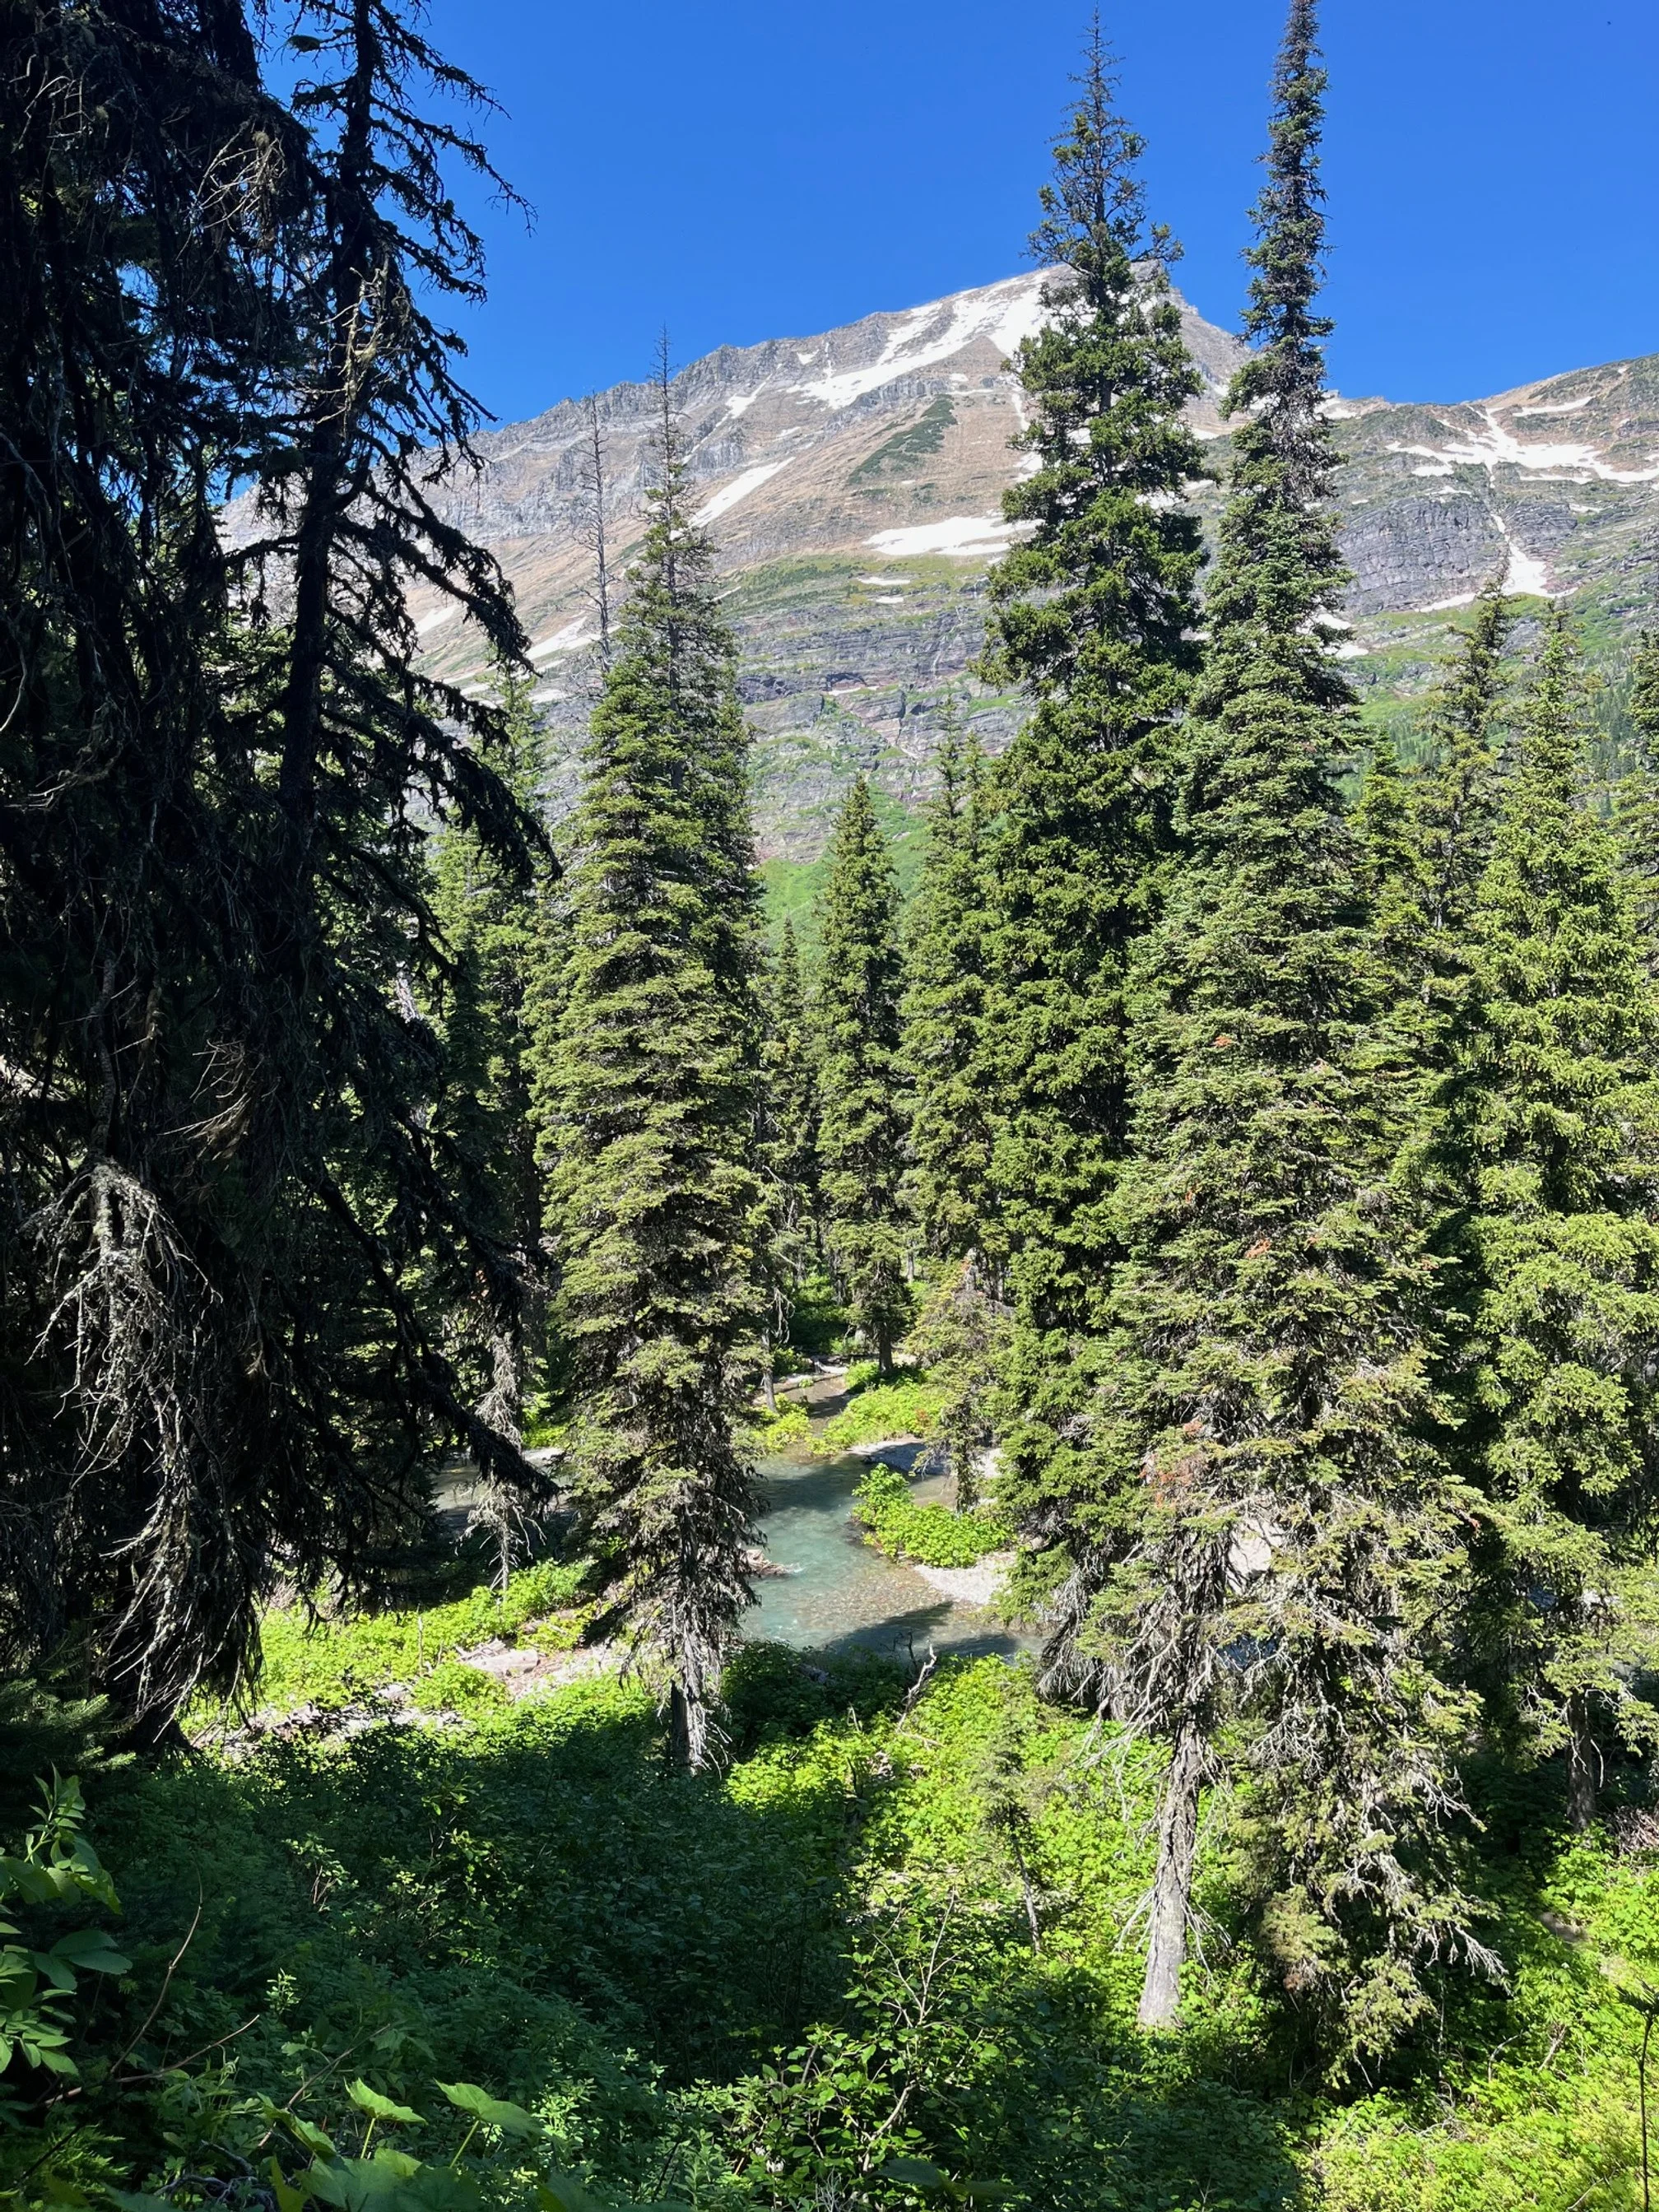
The creek becomes wider, and you’ll get your first glimpse of that stunningly aqua water with the imposing grey mountains above it.
In mid-summer, the mountain sides will have multiple seasonal waterfalls cascading down, making this place feel even more like something out of a fantasy novel.
You can continue to walk around the left side of Grinnell Lake for a bit, but the trail ends as you approach the towering cliffs.
Feel free to linger by the shore for as long as you’d like, enjoying the scenery in this incredible hidden place. (Just remember to catch the last boat back at 5 PM if you bought a ticket for it!)
Once you’re done, retrace your footsteps back to the boat dock or to the lodge.
What to Bring to Grinnell Lake Trail
Bear Spray
If you’re hiking in Glacier in the summer months, it’s always possible that you run across a grizzly bear.
You can find the bears anywhere in the park, but they’re more likely to be at the lower elevations at the same time as the majority of the tourism is occurring.
Be bear aware when you’re hiking throughout Glacier National Park. Make noise on the trail to warn bears that you’re there—after all, they don’t want to be near you anymore than you want to be near them.
You can sing, talk out loud, shout occasionally, or do anything that will let the bears know where you are and in what direction you’re moving.
It’s also important to carry bear spray with you at all times, which should be at the ready. Do not place it in your backpack. Instead, clip it to the front of your daypack so that you can grab it within a few seconds.
Bear spray is one of those things that you get hoping you never need it (and most people don’t), but you really, really want to have it at the ready when you DO need it.
If you’ve never used bear spray before, it’s good to ask a ranger to talk you through the process of deploying it. You have to wait until the bear is surprisingly close to you to use it.
Water
Once you leave the Many Glacier Lodge, you do not have any other options to fill up your water bottle.
No matter if you’re doing the shorter or longer version of the trail, you’re going to be gone long enough that you’re going to be sweating and will want water.
Bring a large water bottle or fill up your day pack’s water bladder before you head out. You can also find a water fountain near the bathrooms on the bottom floor near Heidi’s Snack Shop.
Snacks
Never underestimate the power of a trail snack!
Even though it’s not a particularly long trail in either version I’ve shared above, you still might need a snack break.
When we’re hiking with our kids (as we were on this trail), we always make sure to include a variety of snacks for all of us.
You could even pack a heavier selection of foods and enjoy the world’s prettiest picnic at the lake shore if you can find a couple of logs to sit on.
Just remember to pack out everything you bring in.
Hiking Shoes
This is not the time to set out in your flip flops. Even if you take the boat tour to Lake Josephine, and hike from there, your feet would be miserable by the time you arrived at Grinnell Lake in flip flops.
Opt for hiking shoes, hiking boots, or hiking sandals. I prefer the Keen Newport H2 hiking sandals when I’m hiking in the summer as I can splash in the river and then jump back on the hiking trail in no time thanks to the quick drying neoprene on the shoes.
For hikes in colder weather, I opt for trail runners rather than hiking boots (just a personal preference!). My Altra trail running shoes have a large toe box, which allows for more freedom of movement when I’m on the trail.
And if you’re buying hiking shoes for the first time, be sure to check out my guide to the pros and cons of each hiking shoe type here.
Towel
Once you get to Grinnell Lake, you’ll likely want to linger for a bit.
There aren’t any chairs other than logs or the dirt, so a towel works well as a makeshift seating area.
Despite the chilly water in the lake, we saw many people choosing to swim and splash around in Grinnell Lake!
If you’d also like to try out your own glacier-fed lake day, a towel will get you dried off for your return hike.
We have a set of these colorful Turkish towels that we take hiking and camping. They dry incredibly fast, and 3 years into having them, they’re holding up incredibly well!
Final Thoughts on This Trail


This trail is one of my family’s absolute favorites in Glacier National Park!
I love the different options that are available for visitors so that you can truly choose your own adventure when getting to the lake.
The trail is beautiful at every point, and the lake at the end of this trail is worth every footstep.
Many Glacier is worth a visit just to get out of the rush of people and cars in the main area of the park, but the Grinnell Lake Trail easily bumps Many Glacier into one of my favorite places in this entire area.
Unlike Avalanche Lake over in West Glacier, which has a similarly colorful lake, you will have far fewer people to compete with for space on the trail.
Don’t miss out on this short but incredible hike, which is memorable no matter how you do it!