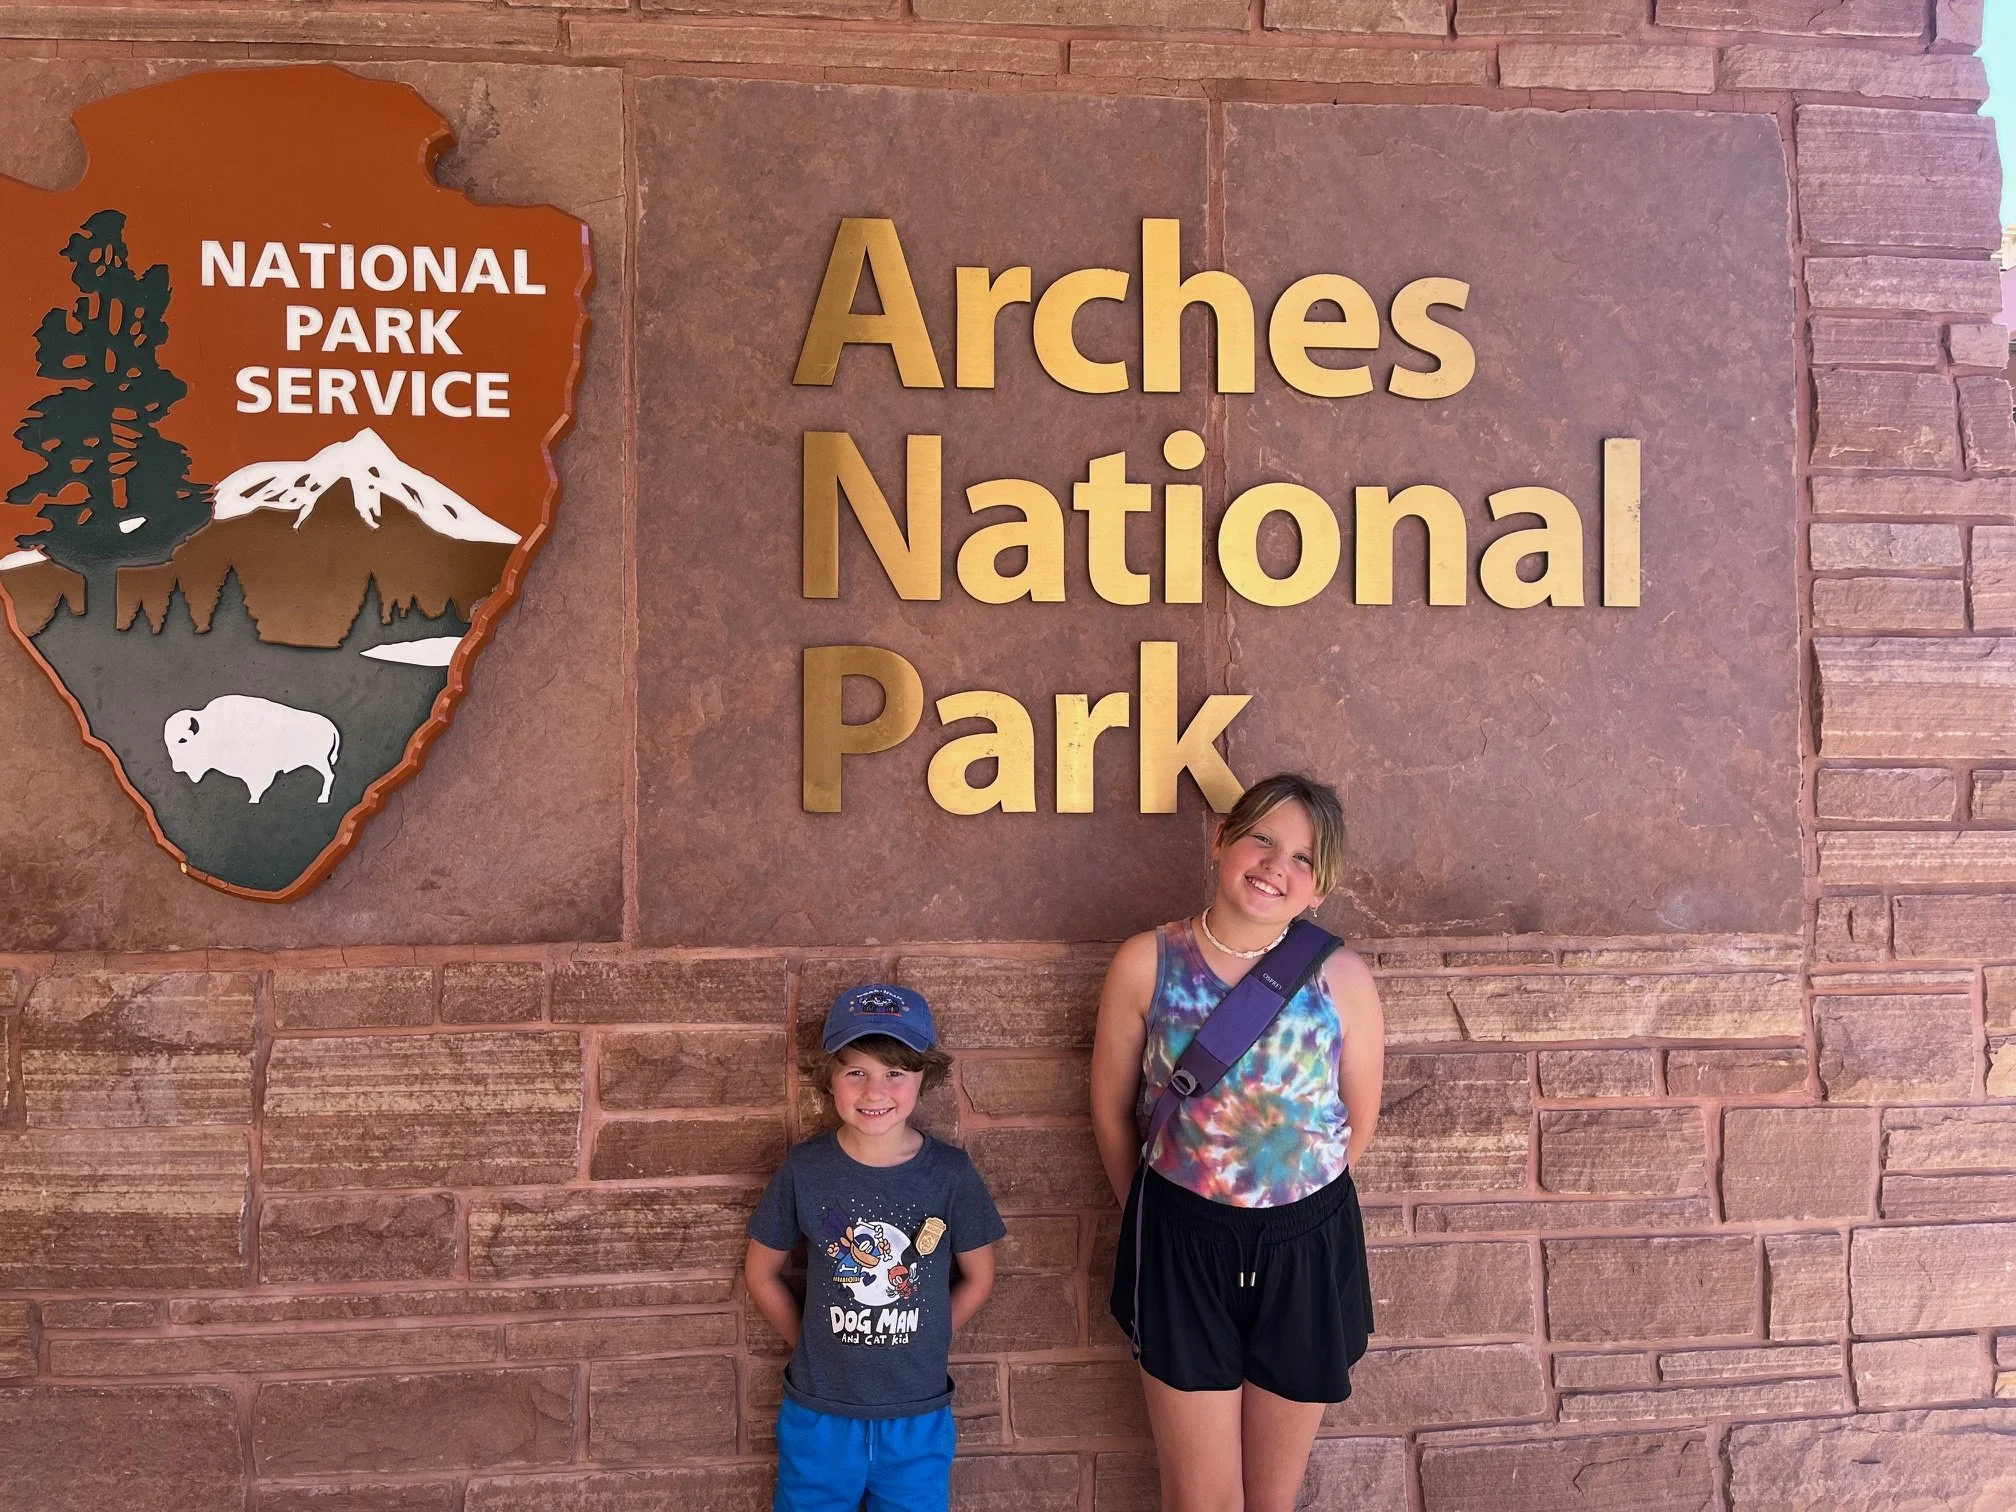
Arches National Park Scenic Drive: Guide, Map, and Tips
Intro
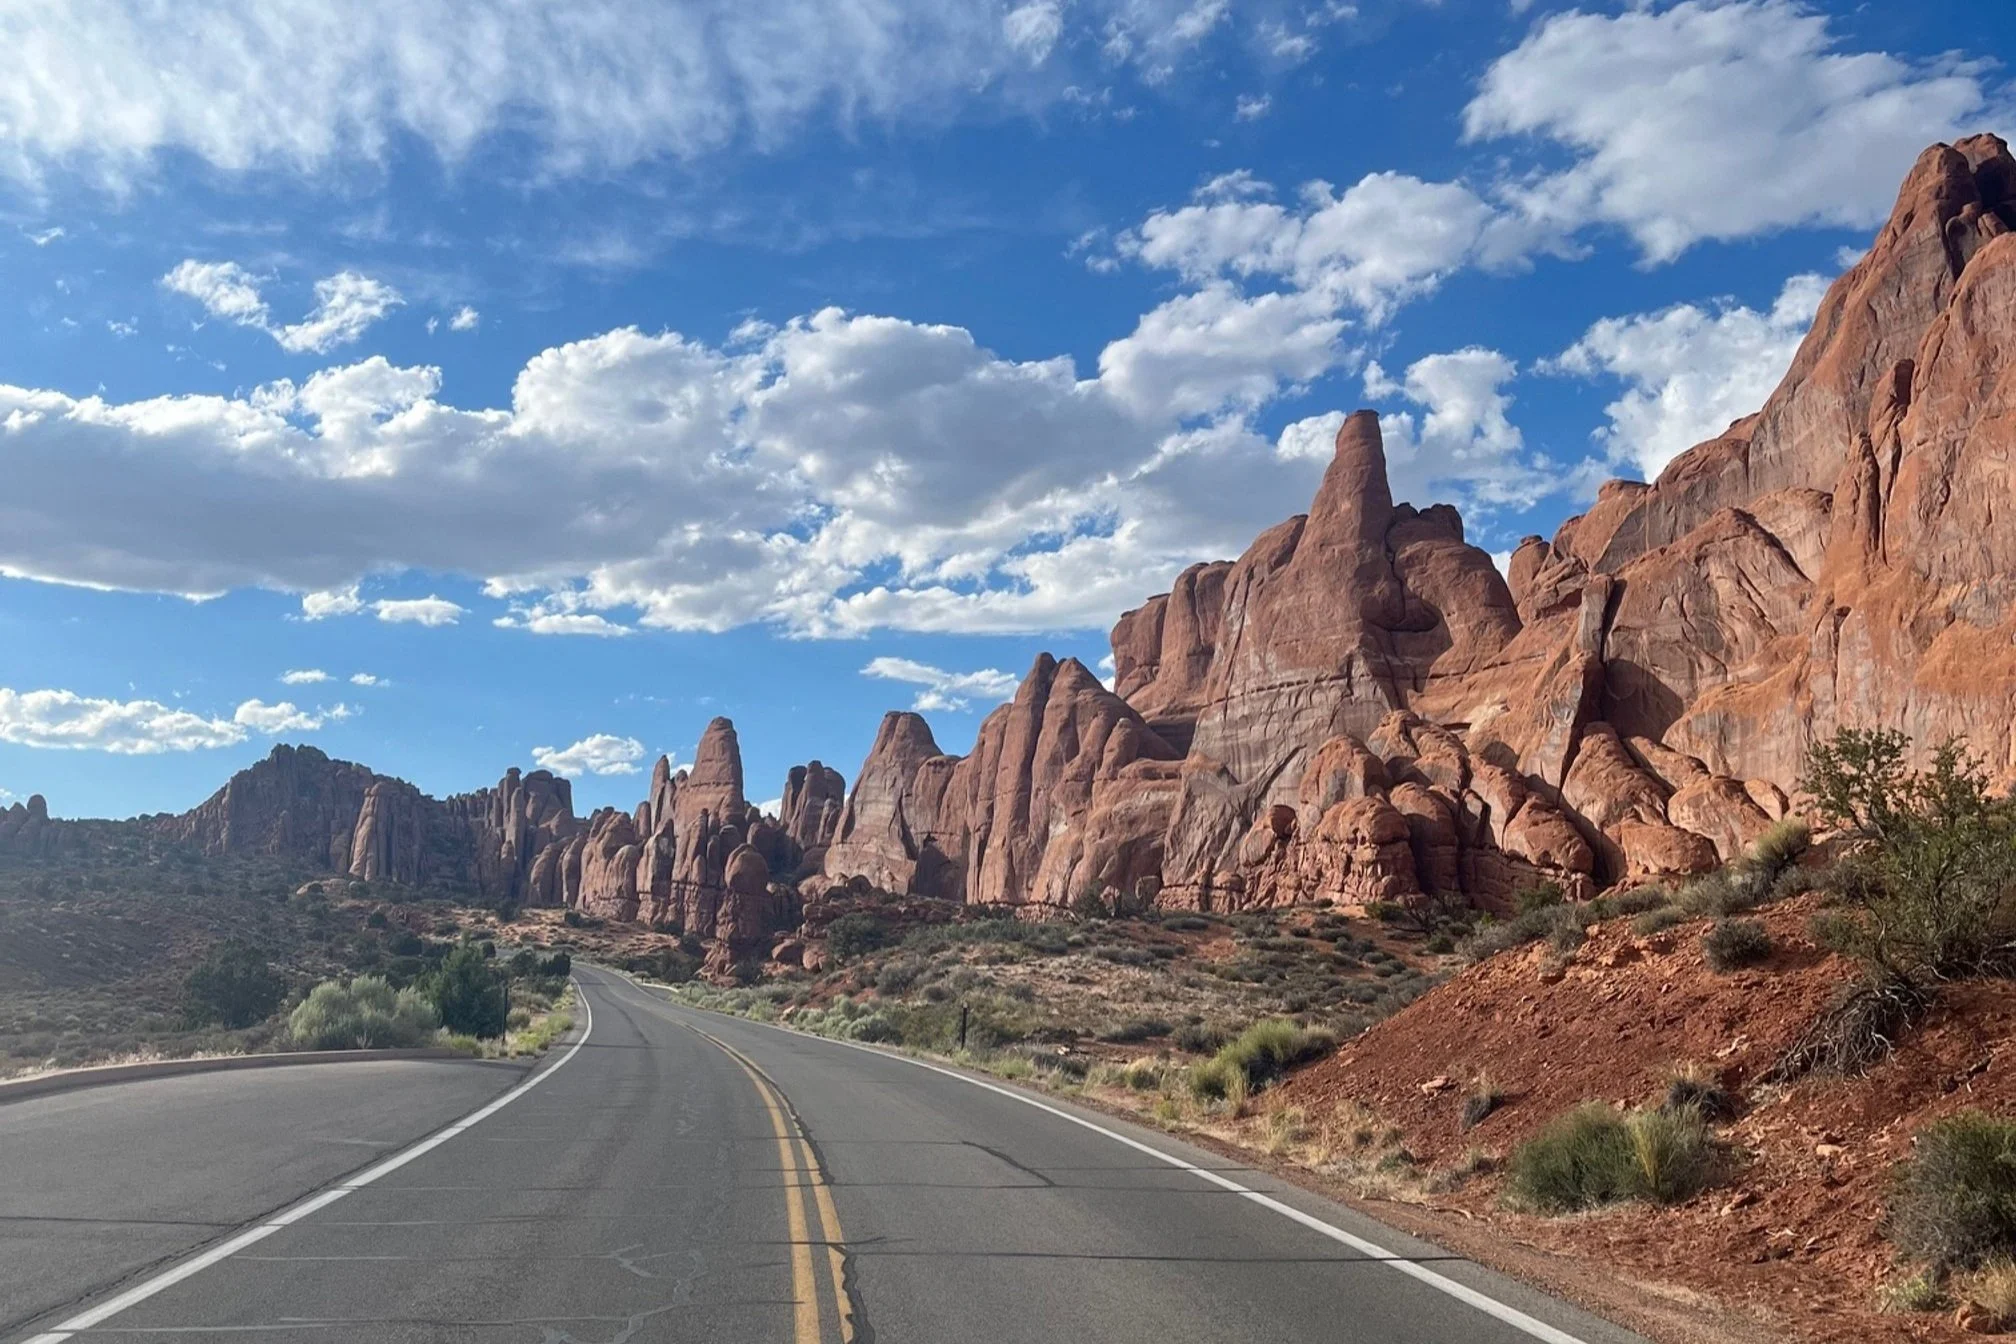
Driving near the Fiery Furnace in Arches National Park
This post contains affiliates. If you purchase through the links below, I will receive a commission at no charge to you.
Driving in Arches: An Overview
What is the scenic drive in Arches National Park like?
The scenic drive here is beautiful at every mile with a landscape filled with towering stone walls, rolling desert hills, and colorful landscapes.
Along the way, you’ll be able to easily stop to see some of the park’s most iconic stone features, including Park Avenue, the Courthouse Towers, Fiery Furnace, Balanced Rock, and, of course, several arches!
While there aren’t any food stands available in the park, you can stop for a picnic at points along the way, making this an excellent overview for your first visit to the park.
There isn’t any public transportation in the park, so you will need to have your own vehicle or a rental car to do this drive.
Is driving in Arches National Park scary?

A section of the Arches scenic drive
No, driving the scenic route in Arches is not scary at all. If you can drive on a regular 2-lane highway, you can do this!
While there are other, more challenging scenic drives in some of the western national parks, like Glacier’s Going-to-the-Sun Road, the main park road through Arches is perfect for easy sightseeing.
(And if you’ve done something like Million Dollar Highway in Colorado, this is a BREEZE.)
The Arches scenic drive is very pleasant and does not require any special vehicles. It is fully paved throughout, including all of the parking areas recommended below.
How long does this drive take?
From the visitors center, it is 18 miles to the end point, Devil’s Garden (so 36 miles round trip).
The speed limit is between 25-45 MPH, so you could drive to the end point and back in as little as an hour if you didn’t make any stops.
However, you’d be missing out on some incredible sites by just driving it straight through!
I would allot 3-4 hours if you plan on having a picnic lunch, doing a short hike or two, and stopping at the majority of the locations I’ve recommended below. It’s a good framework for spending 1 day in Arches National Park.
TIP: Purchase the inexpensive but fantastic GuideAlong audio tour for Arches National Park to make your scenic road trip through the park even more engaging.
Once the tour is downloaded to your phone, you don’t need wifi, which is great for those remote corners of the park. The tour starts and stops automatically as you approach points of interest, and you can relisten to any sections you’d like!
It’s an easy way to learn about the park’s history, important people, geology, and wildlife for less than the cost of lunch.
Best Stops on Arches National Park Scenic Drive

PIN ME!
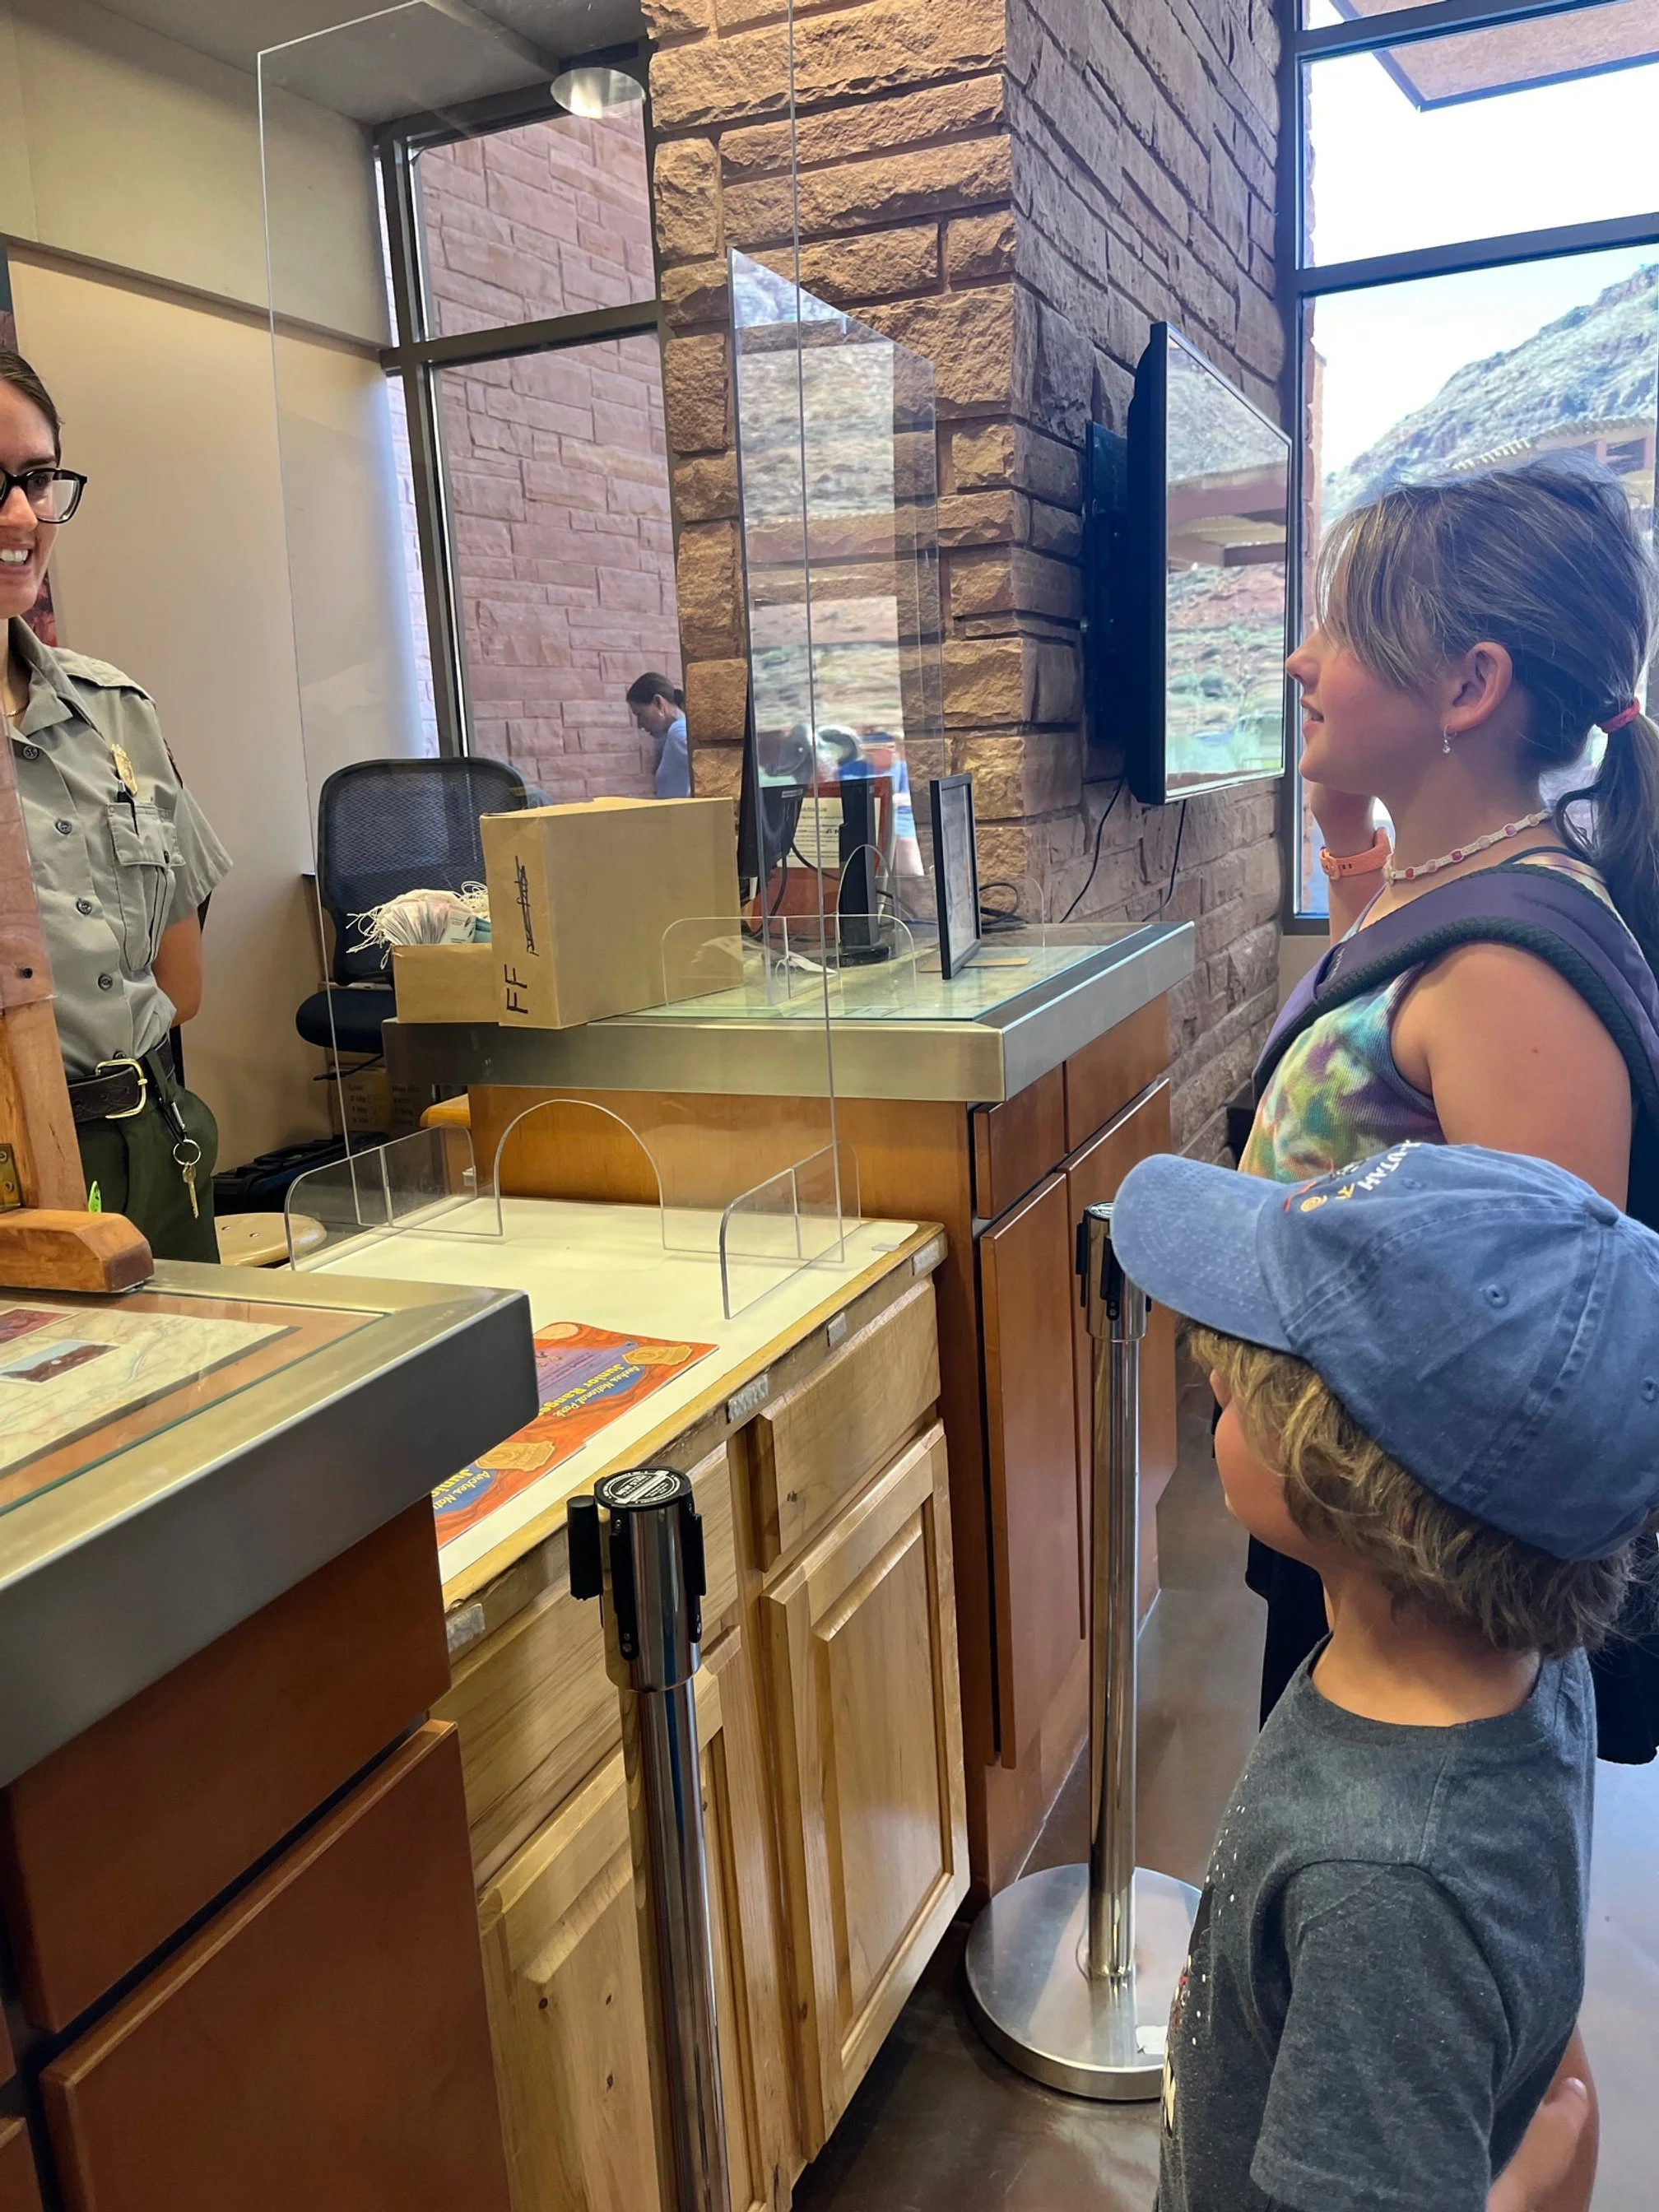
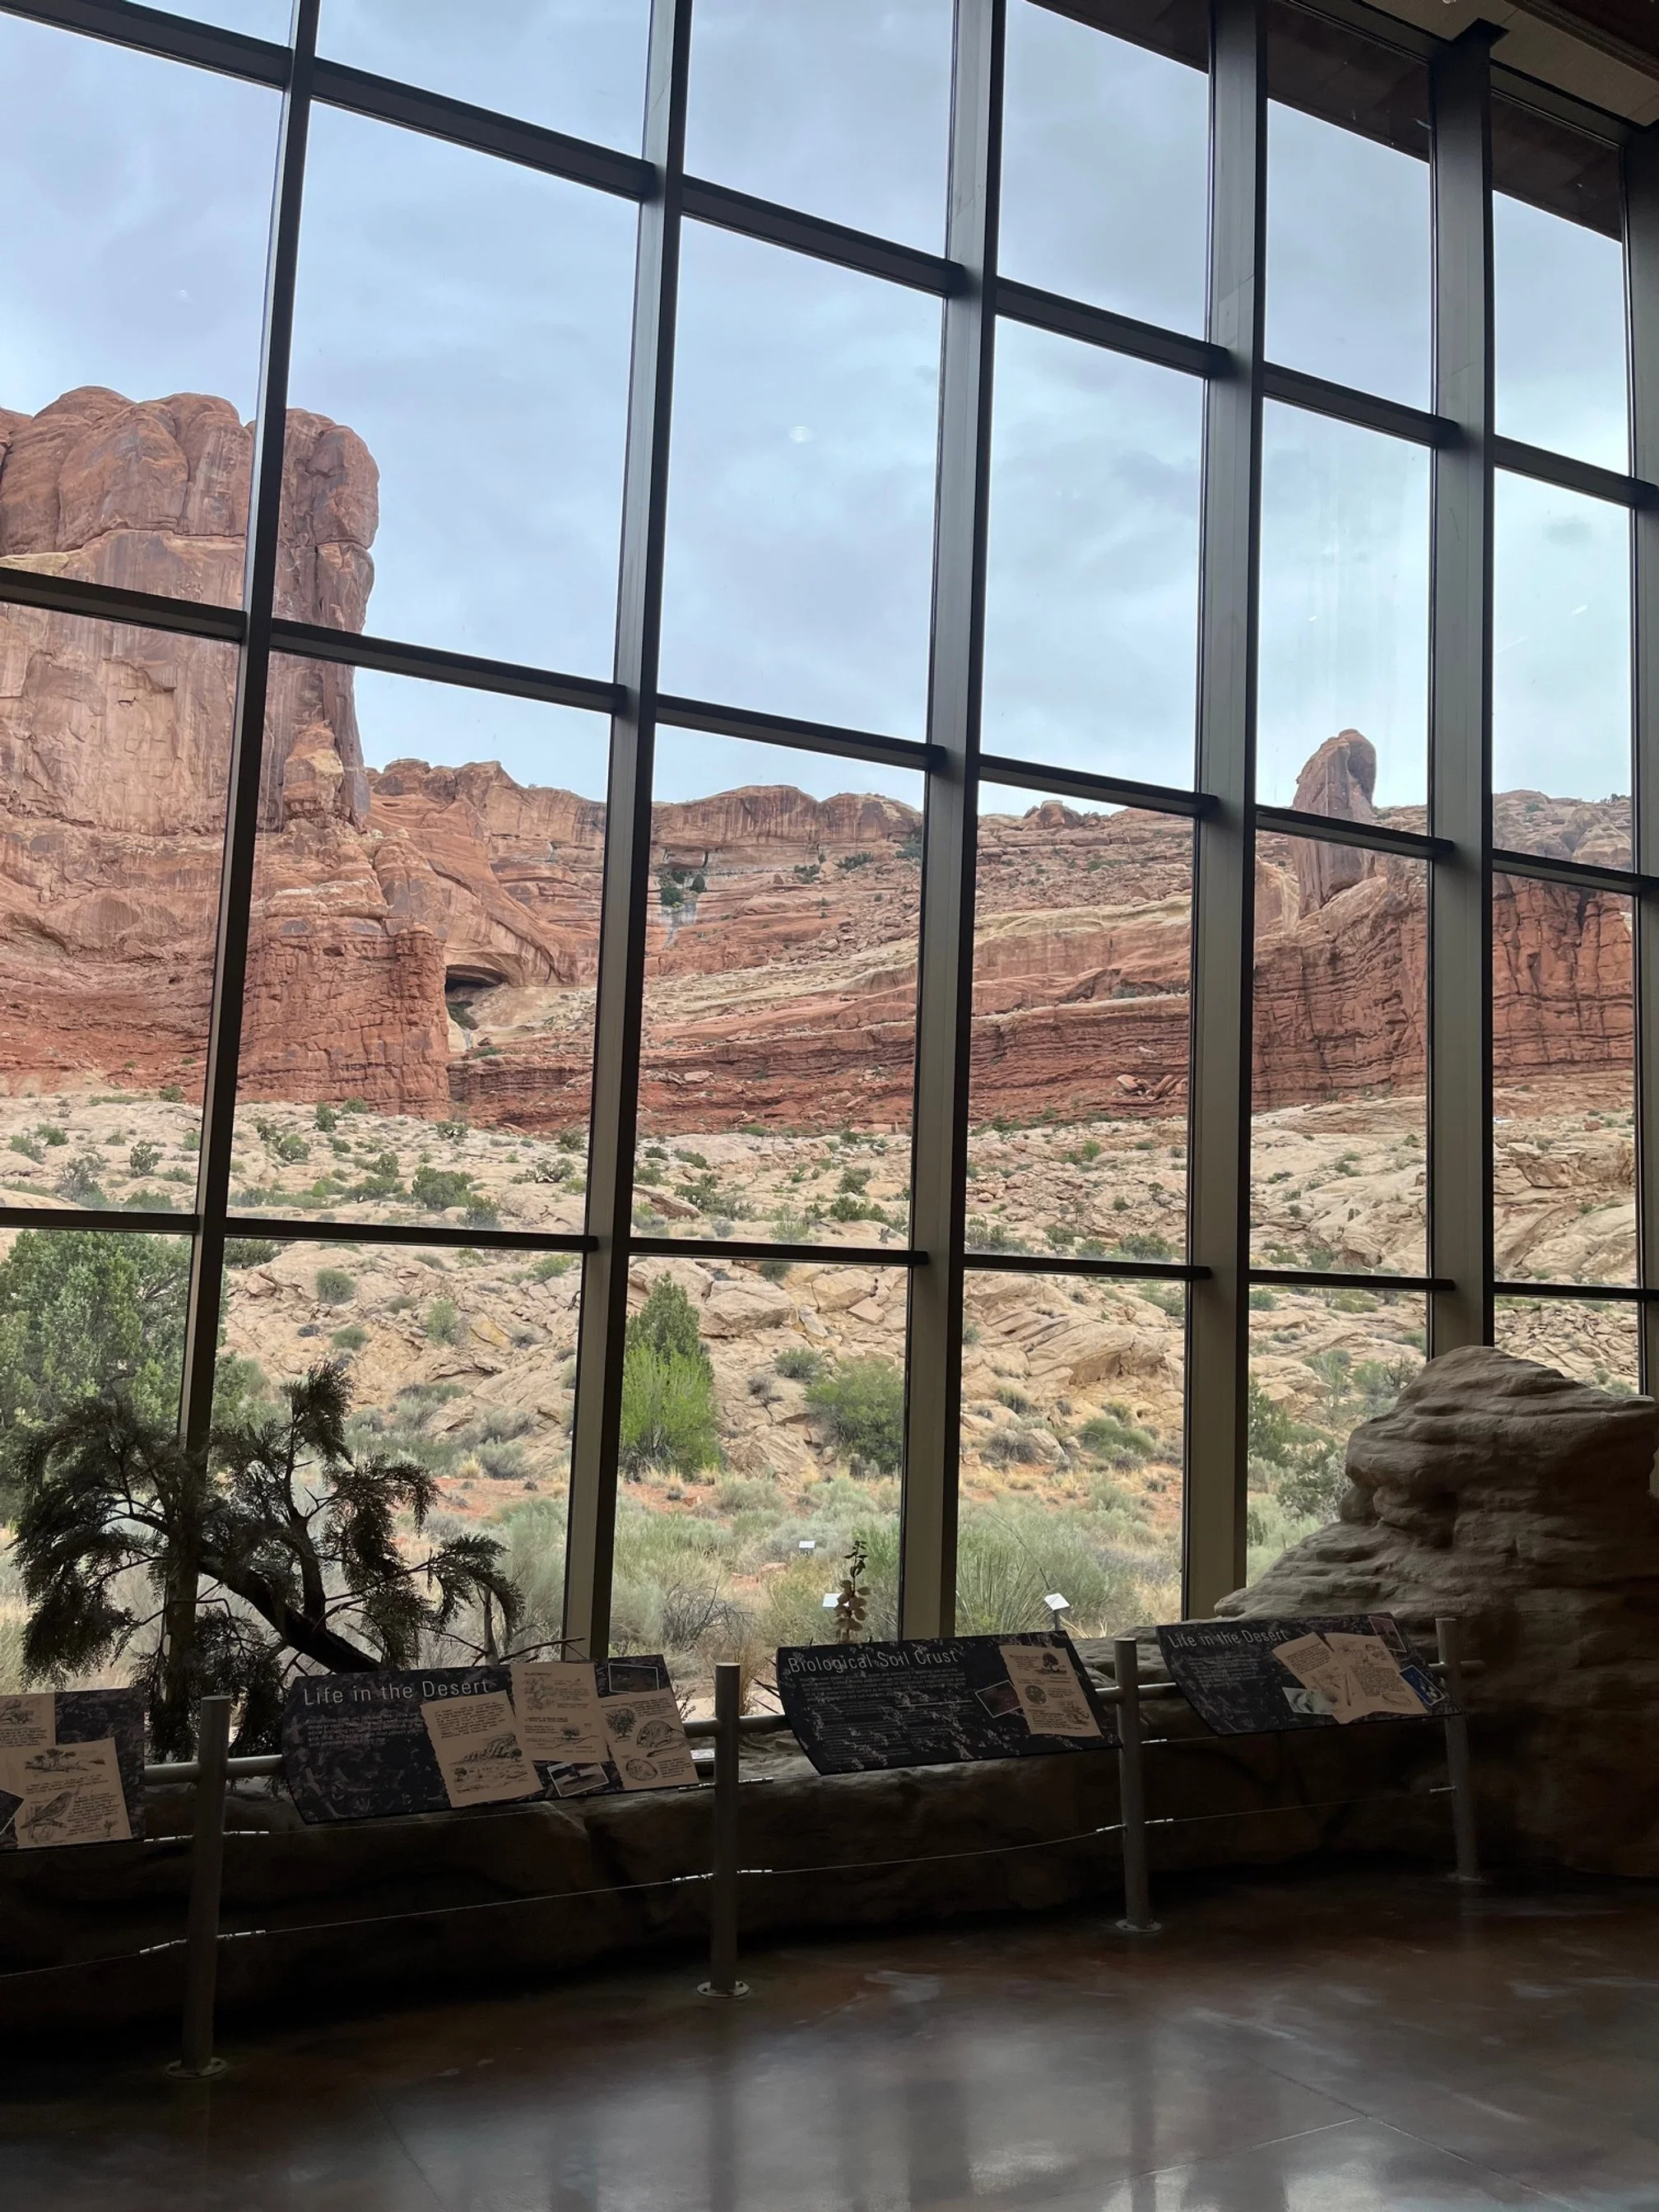
Visitors Center
While it’s always good to stop at the visitors center whenever you’re visiting a national park for the first time, the visitors center at Arches National Park makes for an excellent place to start your drive.
There’s an information desk to grab your Junior Ranger booklets (a must-do if you’re visiting Arches National Park with kids!) and ask questions of the ranger on duty. This is particularly helpful if you’re planning to do a hike or two while visiting and want to check trail conditions and the weather report.
You can also browse through the park store, which has a good selection of poster, shirts, stuffed animals, postcards, and books.
This is the only place to shop for a souvenir in Arches, so be sure to grab what you’d like either now or before you leave the park.
You can also watch the free park movie or explore the many interactive learning exhibits at the back of the building. The exhibits are a great way to learn about the animals and plants you’ll see along the drive as well as get a better grasp on the geology of the park.
From the visitors center, you’ll begin your scenic drive along Main Park Road in earnest as you climb up and up behind the building to the plateau on which the majority of the park rests.
You’ll be amazed at how quickly you gain elevation here as the road does several switchbacks before evening off.

>> Get all of my free Arches National Park planning resources here! <<
Park Avenue

Hiking into Park Avenue in the morning
The first stop you’ll come to along the drive is Park Avenue, which is worth your time if you can find a parking spot here.
The parking area is off to your left as you head into the park.
If you’re visiting when it’s hot outside, this hike is best done in the earlier morning hours before the sun fully covers the path. By going in the morning, the rock walls block some of that direct sunlight, allowing you to complete the hike before the temperatures soar.
The trail is 1.8 miles out-and-back and has scenery reminiscent of Monument Valley and its many buttes and mesas. What you won’t find are an abundance of arches, which might be confusing since that’s probably what you came to see in the park! Don’t worry—you’ll find plenty elsewhere on this drive.
The full hike does descend down into the canyon and, if you’re planning to do this, you could wear appropriate footwear and bring plenty of water.
If you’re not up for a full hike, you can opt for the scenic overlook, which is flat and directly off of the parking area.
NOTE: The full hike takes you to the Courthouse Rocks, which are more easily accessible later in the scenic drive if you are short on time.


La Sal Overlook
Around the bend in the road from Park Avenue is the La Sal Overlook. In 0.4 miles after leaving the Park Avenue parking area, look for the short access road to the La Sal Overlook on your right.
This area provides an incredible view of the La Sal Mountains to the southeast.
From this vantage point, you’ll be able to see multiple peaks in the mountain range, including South Mountain, Mt. Peale, and Mt. Waas.
I’ve always loved this viewpoint for its unique mix of mountain and desert.
The loop parking area has about 20 parking spots, and people tend to move in and out of here quickly, so parking usually isn’t an issue.
Courthouse Towers

The Organ, one of the rock formations in the Courthouse Towers
In 0.9 miles after leaving the La Sal Overlook, spot the huge mesas to your right. (You can’t miss them!)
Pull into the small parking area if you’d like a closer glimpse of them. I’ll be honest—they’re better seen from the road if you want to get the full scale of them.
If you’d prefer to do a portion of the Park Avenue trail, you can pick up the other end of it here.
Be sure to look across the park road to the left side to see the Three Gossips stone structure, which are rocks weathered away to look like 3 round heads and squared shoulders.
At this point, you might be wondering why you still haven’t seen those hundreds of rock arches that you were promised.
While you won’t find any of the iconic arches along the scenic drive in this part of the park, you can see the arch-making process in action if you look along the stone cliffs to your left along as you drive between the Courthouse Towers and our next stop at the Petrified Dunes overlook.
You’ll notice what look like potholes or the beginnings of a cave at various points in the rock: this is what an arch starts out as.
While not all of these depressions will ever become arches, some may over the next hundred thousand years.
Petrified Dunes
Continue further into the park for 2.5 miles until you come to the Petrified Dunes overlook.
By now in the drive, you’re probably realizing that Arches National Park is SO much more than arches! Despite the relatively short length of the scenic drive, you get to see many incredible landscapes and geological formations.
The Petrified Dunes are one of the unexpected geological finds along this road.
The rolling hills you see here are actually ancient sand dunes that have been fossilized. You can see red, orange, yellow, and white striation in the dunes.
While you can’t hike out into the petrified dune field, the overlook is close enough for you to get a good idea about these interesting mounds.
Plus, it’s another excellent vantage point for the La Sal mountains, which make for a gorgeous backdrop to the dunes.
The parking area here is little more than a defined area on the road shoulder, but it’s not typically busy. You can read the interpretive sign by the parking area to learn more.
Balanced Rock

Balanced Rock
One of the park’s most iconic spots, Balanced Rock looks as if it could tip over with just the slightest amount of wind! (In fact, the top of a similar rock formation in the park did break off about 50 years ago, so anything is possible.)
2.9 miles from the Petrified Dunes Overlook is the parking area for Balanced Rock, and it’s worth a short visit if you have time. If you don’t, you can clearly see the rock formation from the road, but drivers might appreciate pulling into the parking area for a better look!
Speaking of the parking area, this is one area of the park that stays busy during the middle of the day. Since Balanced Rock is eye-catching, visitors will pull over on the spur of the moment to see what it is.
That, plus those who’ve pre-planned the stop or hike, ensures that the 19 parking spots here stay full during peak times. The loop parking area does make it easy to keep circling if you want to find a spot as someone else leaves.
Once you’ve found parking, you have 3 options:
You can view Balancing Rock from the parking lot. As I mentioned before, you can see it in its entirety from this vantage point.
You can walk out to the overlook area. This short, flat, and paved trail is accessible for strollers and wheelchairs, and provides a closer look at the rock formation.
You can complete the Balanced Rock Trail. This loop is 0.3 miles and carries you around the base of Balanced Rock. It’s also flat and very easy, but it is unpaved.
Panorama Point
Continuing on 1.4 miles into the park, you’ll come to a short side road leading to the loop parking area for Panorama Point.
You can get the scope of this area here, where you’ll feel small compared to the sweeping desert in every direction and the La Sal mountains off in the distance to your right.
The Great Wall (seen along the road from near the Courthouse Towers to Balanced Rock) has fallen away here, and there’s just desert vistas, mesas, buttes, and rocky terrain surrounding you.
This tends to be one of the quieter overlook areas since there’s not a specific landscape or focal point. It’s still worth stopping by, thanks to the pretty views, the vault toilet and the covered picnic tables.
Salt Valley Overlook

Salt Valley from the overlook
Continue on the park road for another 3.9 miles, continuing by the turn-off road to Wolfe Ranch, Delicate Arch Trail, and the Delicate Arch Overlook Trail. (These are worth a visit if you have more time later in your trip!)
You’ll come to the short turn-off road for the Salt Valley Overlook on your right.
Walk along the sidewalk to take in views of the valley and see if you can see the white striations that are the salt bands from which the site gets its name.
This is another great example of the variety of landscapes and geological features that can be found in Arches National Park other than the stone arches.
There are 8 dedicated parking spots as well as spaces to park on the right of the road in the loop.
It’s not a wildly popular stop, so you should be able to find a spot without any issue.
Fiery Furnace Overlook
Only 0.8 miles down the road is the Fiery Furnace Overlook. This area is another iconic spot within the park, and it is known for its otherworldly rock formations and maze-like hike (available only by permit).
If you want to see the Fiery Furnace without dedicating several hours to a permitted hike, the overlook is the way to go.
The overlook trail does not go into the Fiery Furnace, but allows you a vantage point from which you can see the sandstone walls, chimneys, and hoodoo-like structures that make it up.
The trail from the parking area to the overlook is relatively flat, packed dirt with fencing on one side to mark the trail.
In the parking area loop, there are 16 pull-in parking spots, and room for around that same number of vehicles to parallel park on the side of the road.
This overlook can get busy at peak times, but visitors turn over pretty quickly, so loop around until a space opens up.
Sand Dune Arch and Broken Arch

My dad, my kids, and I at Sand Dune Arch
A little over 2 miles further down the scenic road, and you’ll be at the parking area for Sand Dune Arch and Broken Arch.
You’ve finally made it to see one of the park’s stone arches, and these are 2 fascinating ones within one easy hike.
There are 19 pull-in parking spots, 2 handicapped spots, and room on the side of the parking loop for another dozen vehicles or so to parallel park.
You’ll also find a vault toilet at the parking area.
Sand Dune Arch is very close to the parking area and requires only about 0.25 miles to hike to.
Broken Arch is a bit further. You can hike the entire 2.3 mile loop trail (which provides viewing of multiple arches), or hike to Broken Arch, which is about 1 mile out-and-back.
Learn more about these arches and the trail that connects them in my hiking guide to Sand Dune Arch and Broken Arch.
Devil’s Garden
The end point of the scenic route in Arches National Park is Devil’s Garden, where you’ll make a loop before heading back the way you came.
If you’d like to linger here for a bit before turning back, there are picnic tables and a vault toilet. You can also find the Devil’s Garden Trailhead here, which is a difficult 7.8 mile round trip with 8 different arches to view along the way.
You can cut the hike shorter by only going to Landscape Arch (1.9 miles out-and-back).
When you’re done here, you can catch any of the overlooks you missed on the way here, or head off of the scenic road to see Delicate Arch or the Windows sections of the park.
Tips for Making the Most of Your Scenic Drive
Remember your reservations.
Arches National Park has a vehicle reservations system in place for peak visitation times, so you’ll want to be sure to have your timed entry in hand before your arrive.
If you’re visiting between April and October, you’ll need to see if your visit falls during the days that the reservations are required. Check the official NPS site for exact dates.
This timed reservation is separate from your required entry fee, which can be paid at the gate.
If you’re visiting more than 2 NPS sites in the next 12 months, I highly recommend getting an annual pass, which will allow you into any of the more than 400 national parks, battlefields, monuments, seashores, and historic sites.
And for even more savings, grab the NPS annual pass and AllTrails+ bundle here.
Bring water and snacks.
Once you leave the visitors center, there are very few amenities in the park.
You will find a water bottle refill station at the visitors center, which is a must-do before you head onto the scenic drive.
Arches National Park is in a desert environment, and, thus, temperatures can climb into the 90s and even 100s in the summer. Even in the winter months, the air is dry, so you’ll always need more water than you think to stay hydrated.
Visiting between May and September? Read my tips for hiking in Arches in the summer.
There aren’t any places to buy food in the park, so you will want to carry in snacks or even a full meal if you plan to slowly work you way along this drive.
There are picnic tables at the visitors center, at Panarama Point, and in Devil’s Garden if you’d like to stop to eat.
If you’re looking for a cooler that’s up to the task of keeping your food cold in Arches, I highly recommend the SetPower refrigerated cooler. We have one of these, and they are a game changer since you don’t have to keep refilling it with ice!
Fuel up ahead of time.
There’s no gas in the park, and the closest gas station is 5 miles from the entrance of the park in either direction.
You can either head south to Moab or north to the gas station at the Sun Outdoors Canyonlands Gateway campground.
Don’t rush.
I think a lot of visitors to Arches are determined to see the highlights—like the Windows, Balanced Rock, and an arch or two—but there’s so much to see here beyond those.
By taking the scenic road with purpose and getting out at the overlooks other than the super popular ones, you’ll come away with a much better understanding of what makes this park so special (and it’s not just the incredible arches!).
Even if you’re limited on time and are doing both Arches and Canyonlands in 1 day, you’ll still have some time to explore along this road.